


wingless
-
Posts
710 -
Joined
-
Last visited
-
Days Won
74
Content Type
Profiles
Forums
Events
Posts posted by wingless
-
-
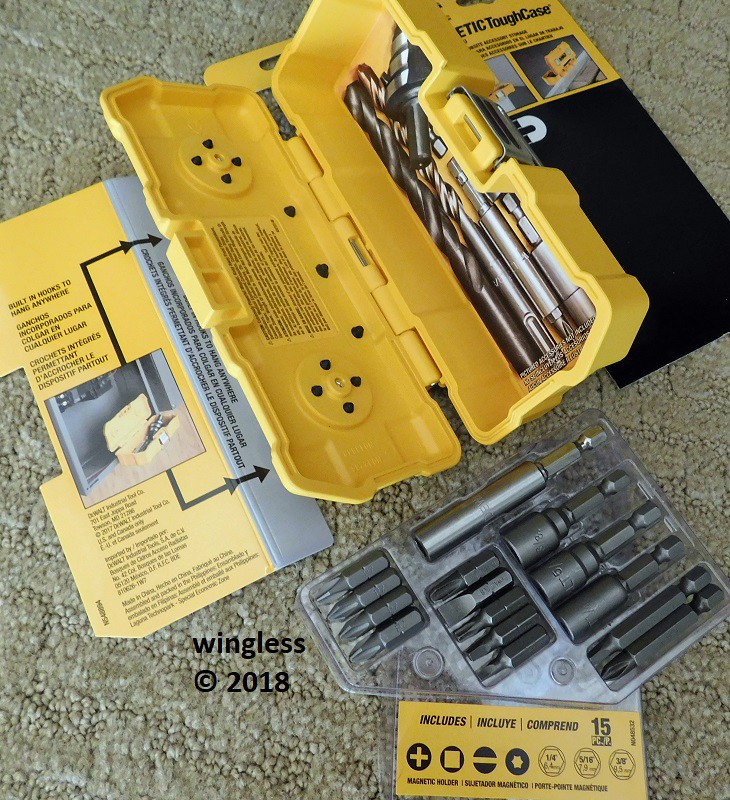
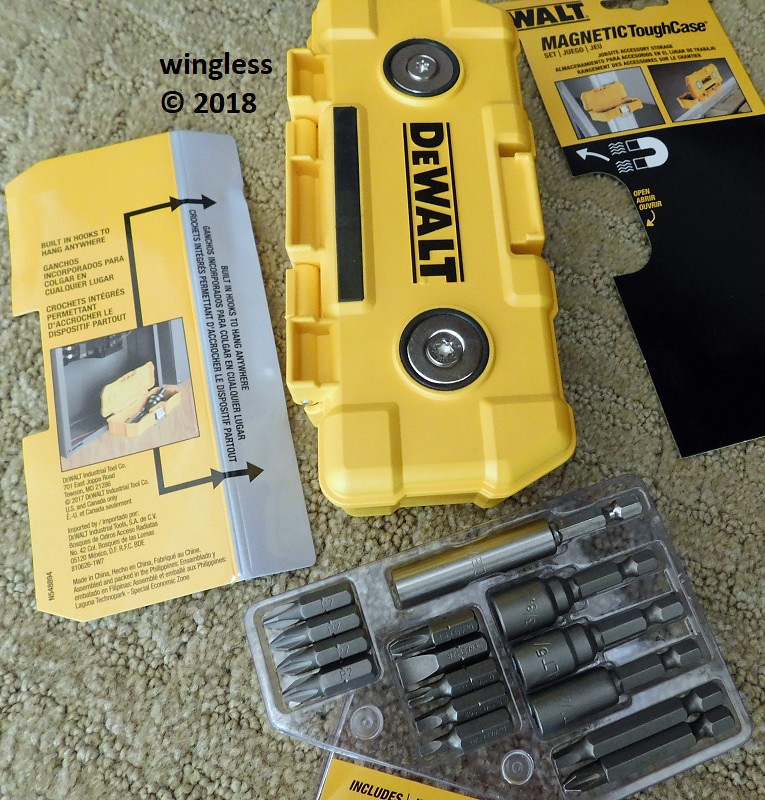
DeWalt DWMTC15 Magnetic Yellow Tough Case
The DeWalt DWMTC15 magnetic case is a very handy enclosure. The exterior dimensions are 7" x 2-3/4" x 1-3/4". The empty mass is: 6.0 oz.
This slender case is easy for pocket storage.
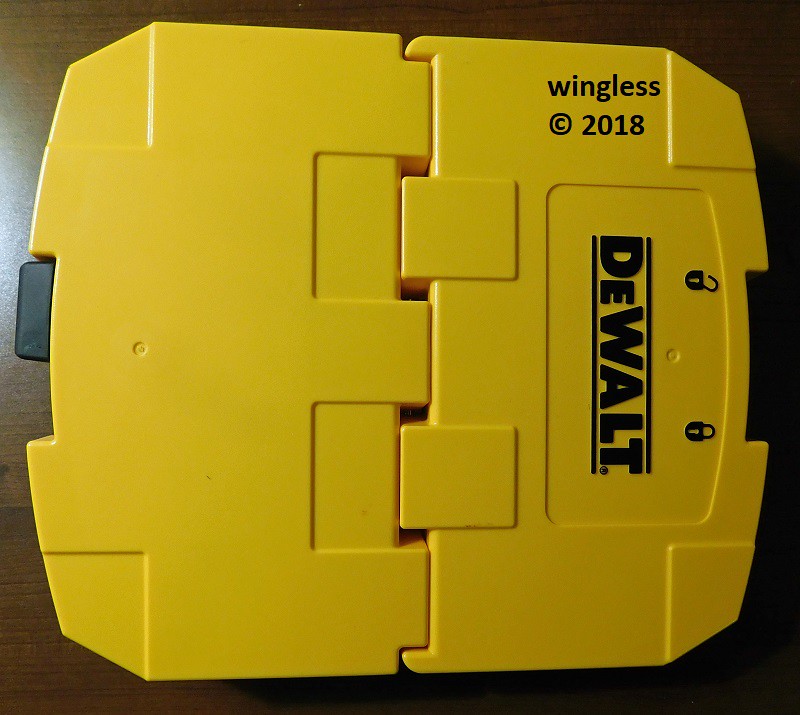
The hinged clam shell case top cover opens just past 90°, so gravity keeps the cover open. The cover / base has a rib and corresponding groove around much of the perimeter to limit exterior contamination intrusion.
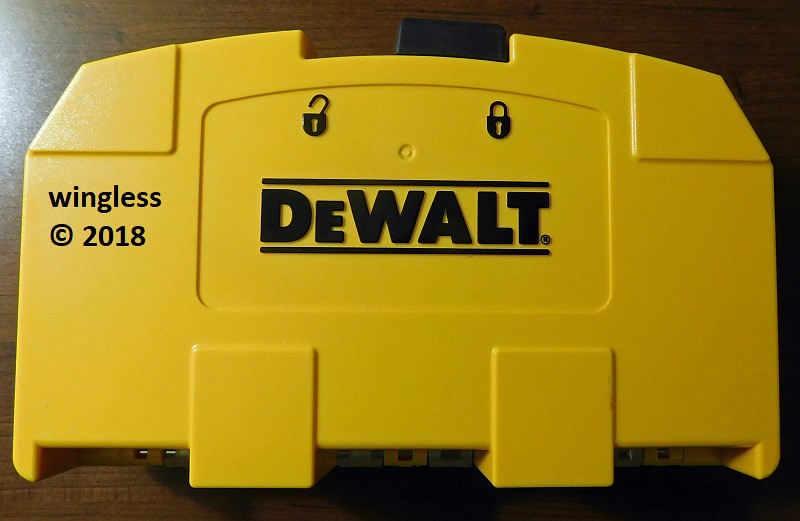
The case has a pair of strong magnets (plus rubber strip) on the lid for attachment to a metal surface. The base has a channel to grab onto a rib.
The case interior has a label with this very handy text: "CAUTION: Extremely Powerful Magnet. Keep Away From Pacemakers, Defibrillators, Medical Equipment, Computers, Computer Discs, Cassette Tapes, Engine Control Modules, Etc. When Using Vertically Or Upside Down, Weight Of Items In Tray Must Not Exceed Magnet Strength."
There is a metal draw down latch.
There is a full-length metal hinge rod on the piano hinge. This appears very sturdy for long-term strength.
The kit includes 15 bits, all are ¼" hex drive, the longer ones have the power groove retention radius on the ¼" hex shank. These are: 3" magnetic holder; three magnetic nut drivers; two 2" bits and nine 1" bits.
-
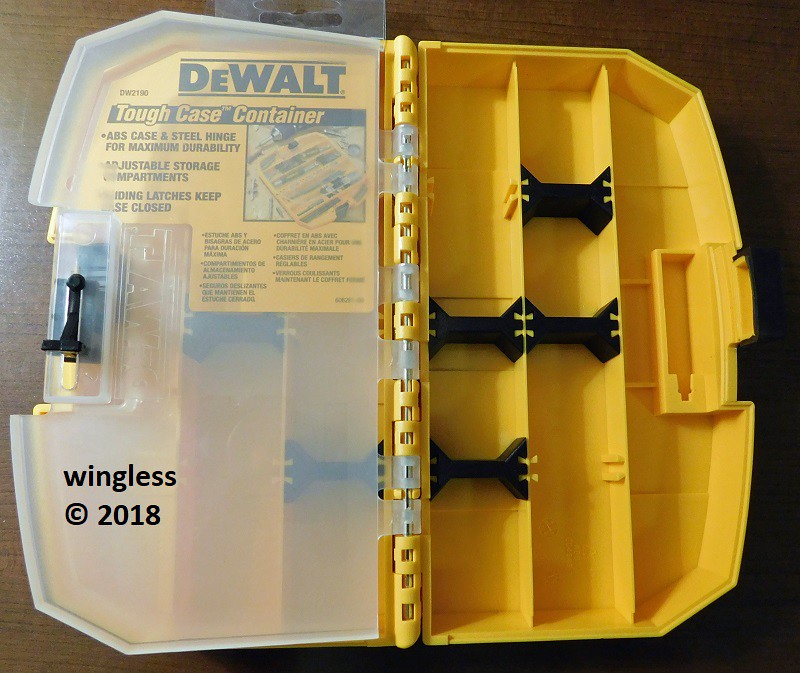
DeWalt DW2190 Case
The DeWalt DW2190 case is an empty clam shell yellow plastic storage case. The case exterior dimensions are: 7-5/8" wide x 4-5/8" Deep x 1-3/4" Tall. The mass is: 10.6 oz.
Each case half has three long open top bins, two are 7-3/8" x 1-1/8", each with three locations for bin divider partitions. The third bin has a curved side and no bin divider locations. All are 11/16" deep.
There are six bin dividers included that may be positioned as-desired.
The case has translucent cover doors with slide latches. These permit observing the contents prior to opening. It is not possible to close the case, without first latching those internal covers. The snap action on the internal cover latches aren't great, but the feel may improve with usage.
There is a full-length metal hinge rod on the piano hinge. This appears very sturdy for long-term strength.
The case has a slide latch that has a nice feel. The case has clearly visible black on yellow logos indicating the locked and unlocked latch positions.

-
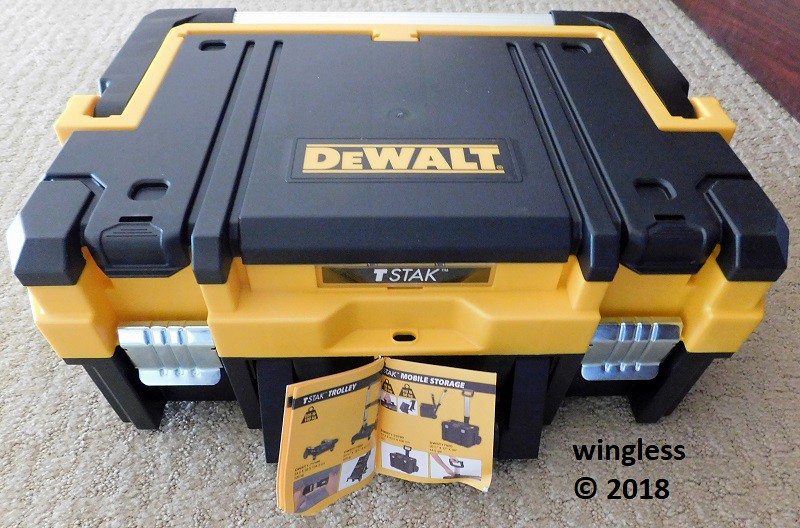
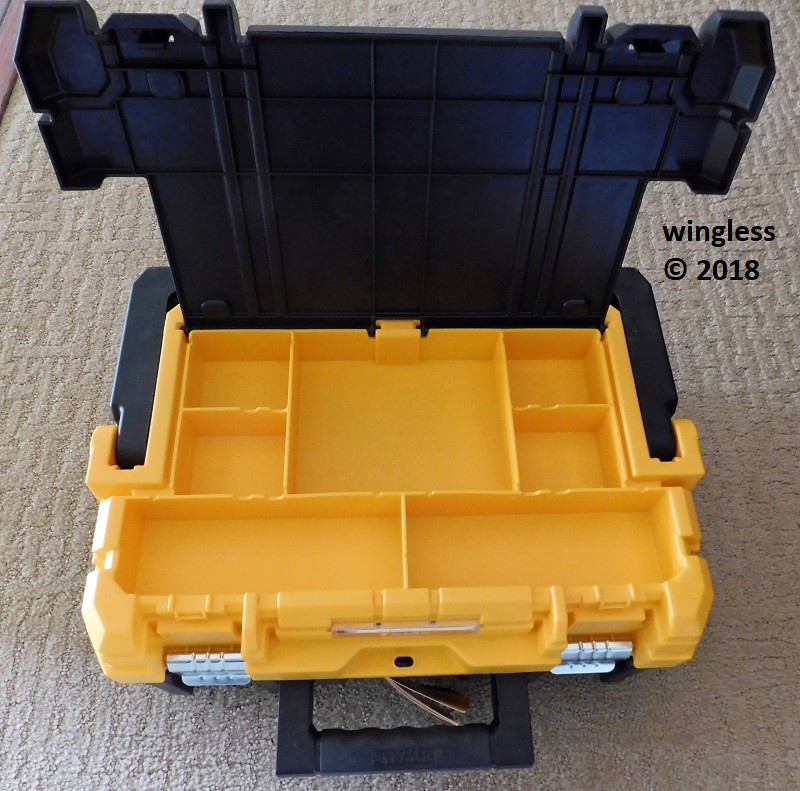
DeWalt DWST17808 TSTAK I Long Handle Toolbox Organizer
This toolbox is part of the DeWalt TSTAK tool storage system. The system permits stacking multiple storage boxes and also has options for mobility.
When used in a stack, this toolbox is designed to be at the top.
Capacities / Measurements / Features
Volume: 2.9 Gallon Capacity - Specified
Exterior: 17¼" Wide x 13-1/8" Deep x 7" Tall - Measured
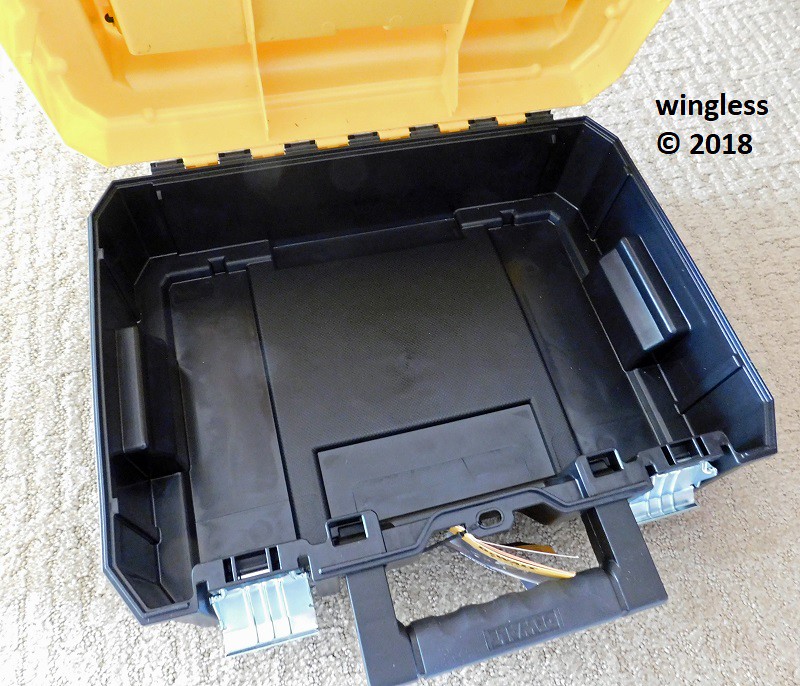
Interior Base: 16½" Wide x 11" Deep x 5¼" Tall - Measured
Interior Top Compartments: Two 7-3/8" Wide x 2½" Deep, Four 2-15/16" Wide x 2-9/16" Deep and One 6¼" Wide x 5¼" Deep, all 1-5/8" Tall - Measured
Extruded Aluminum Top Handle: 1¼" DIA x 14¼" Wide - Measured
Molded Plastic Front Handle: 1¼" DIA x 5¼" Wide - Measured
Mass: 5lbs - Measured
This is a really nice storage case, with a large storage area in the bottom, plus smaller open-top bins in the top.
Both the main lid and the top lid open just past 90°, so gravity will keep the top open.
There are two large metal lever latches for the large bottom storage area. The top lid has flexible snap latches.
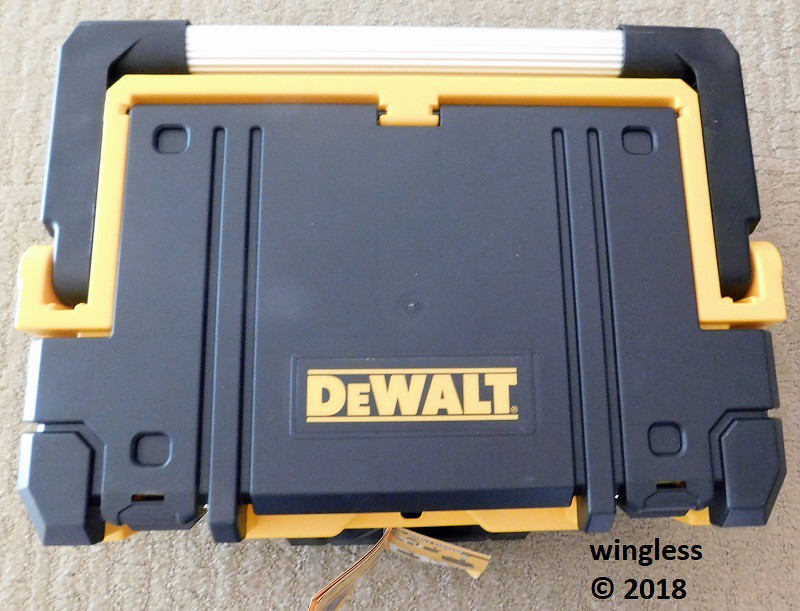
The top lid hinge pins are molded-in as part of the cover. The large cover has a full width piano hinge w/ a metal hinge pin.
There is a padlock slot for the large bottom storage area that will accept a ¼" padlock.
There is a removable clear nameplate window for a protected user identification label. There is an included P/N 13487 3-5/8" x 3" paper tag w/ perforations to separate into six window labels. I don't use this and instead use my Brady IDXpert label printer to print a ½" tall label adhered to the case and covered by the window.
Both handles have detents to remain secure in the stowed or deployed position.
-
This topic shows details of accessories that I purchased with my cash from my own pocket.
There is zero affiliation between me and the manufacturer or the vendor.
-
Done, good luck.
-
The auger style mixer has been working very well for my mortar projects.
This has been used for many, many dozens of mortar bags, mixed in a 5 gallon bucket, half-full (or half-empty, depending on your perspective).
A corded hand drill grabs this auger mixer rod in the keyed chuck.
The auger does a nice job of creating a suction, to draw from the sides and from below to get a great mix.
A paddle mixer might also be effective, but it is going to be a much greater torque load on the tool and on the operator. A paddle mixer works great in paint and other liquids. It wouldn't be my first choice for mortar.
-
 1
1
-
-
Nice video on sharpening a carbide blade.
-
Thanks. Nice job on yours too.
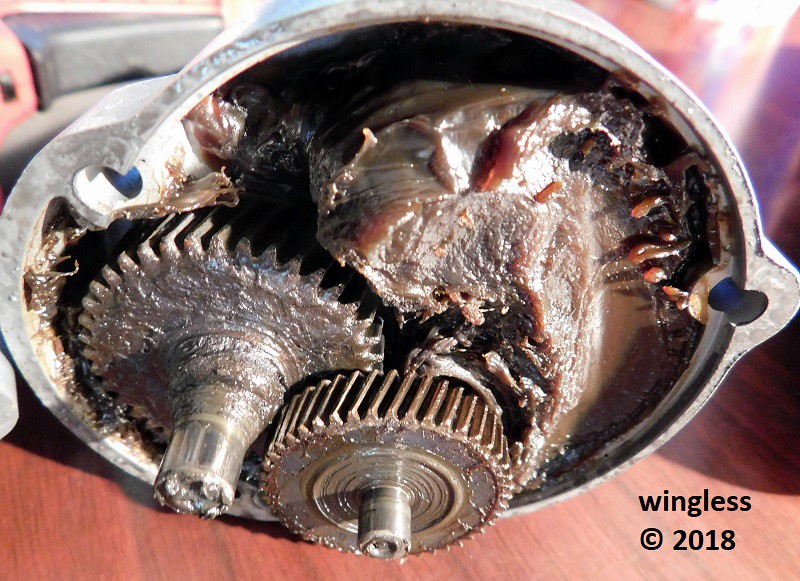
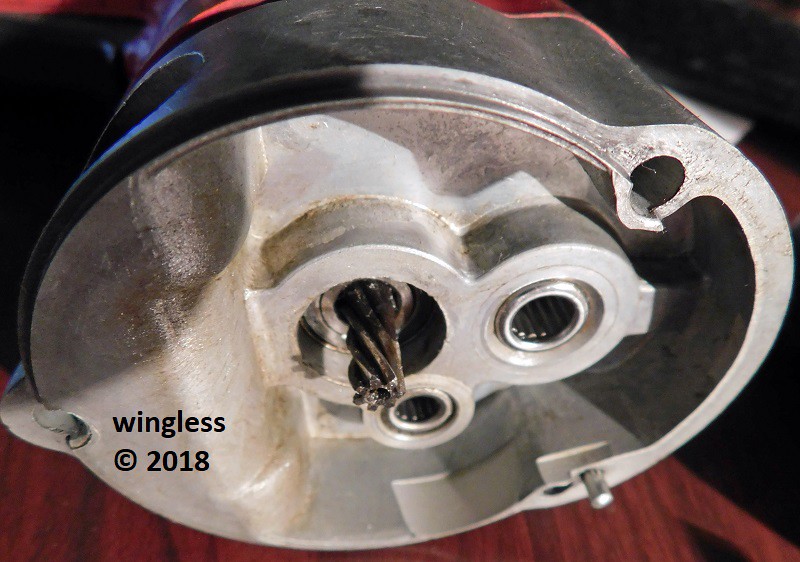
The old grease was scooped out with a small, flat screwdriver. A paper towel was used to wipe the surfaces clean.
A toothbrush (I used the wife's) was used to clean the bearings, the gear teeth and the entire housing interior.
-
Yes, the DeWalt DWS5027 Tracksaw T-Square has been discontinued and is no longer available.
This review of that DeWalt DWS5027 square, with the Festool track system, reveals that, in this example, the DeWalt square was close but not square.
Given that the DeWalt fits the Festool rack, then the converse might also be true. An option that could be explored is getting a Festool square for usage with your DeWalt rack.
-
Done, good luck.
-
On 11/1/2018 at 9:59 PM, wingless said:
My preference has always been for a keyed chuck, but those are also gone the way of the dinosaur. I hate when a chuck / drill bit slips and there is no way to get it any tighter. So far I like this keyless chuck. The audible / felt clicks when hand tightening appear sufficient.
I put the Forward / Reverse switch in the center off position, instead of removing / replacing the battery pack whenever I need to swap a bit.
This keyless chuck is very secure. I've been using this tool lots, with frequent drill bit exchanges and in every case the chuck has been very secure, without any drill bit slip.
The chuck makes a ratcheting sound / feel when the outer collar is rotated by hand when the forward / reverse switch is in the center off position.
-
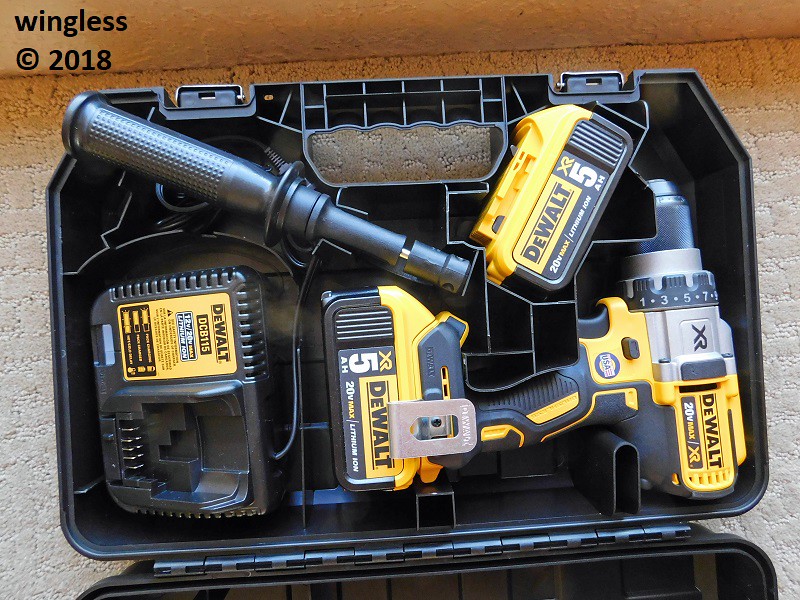
wingless' DeWALT DCD991P2 20V Max XR ½" Drill Kit - Includes: 20V MAX XR DCD991 ½" Drill; two DCB205 5Ah Battery Packs; a DCB115 4A Charger; a N433408 side handle; a N268241 belt hook w/ mounting screw and a N200697 hard tool box.
This DeWALT DCD991 Type 1 20V Max XR ½" drill kit is to retire my 30-year-old Milwaukee 0224-1 3/8" Magnum corded drill.
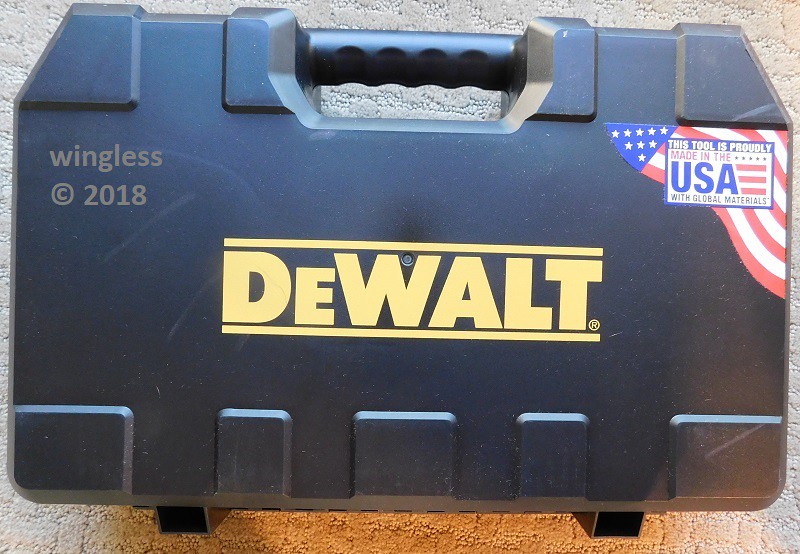
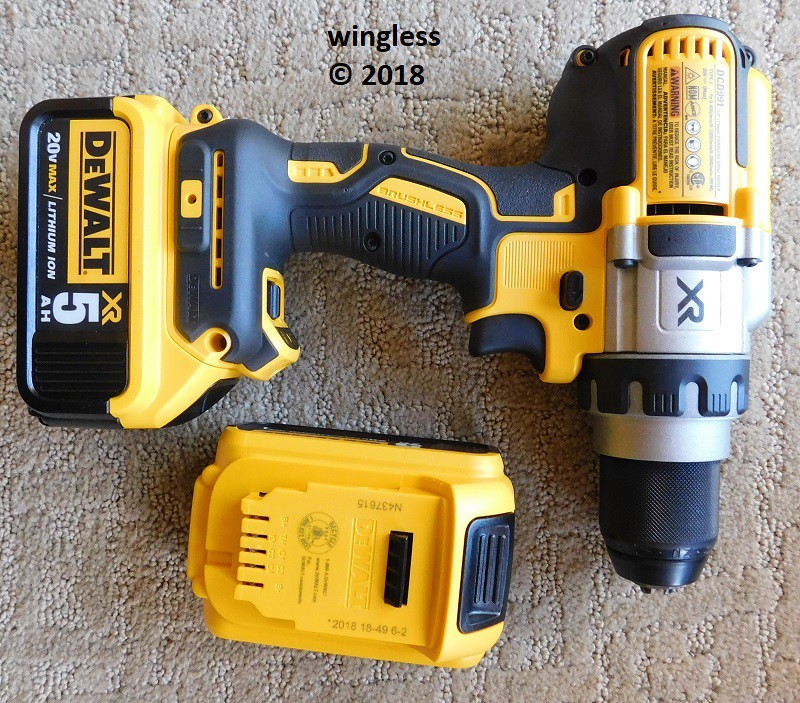
The tool weighs 4lbs, 8oz, w/ a 5.0Ah battery pack and the included belt clip. The top/bottom balance is nice and appropriate. The tool is "made in the USA with global materials". These two DCB205 20V 5.0Ah100Wh battery packs are made in Korea. This DCB115 4.0A output charger base is made in China. The tool includes a N433408 side handle.
After many months working w/ my daughter and her cordless tools, that reaffirmed my conviction that I am a troglodyte in my views on corded versus battery powered tools, leading me to investigate then select this cordless drill. My plan is to use this as my primary tool and the Milwaukee as a back-up.
The rated no load speeds are 0-450/0-1,300/0-2,000 rpm.
The DeWALT DCD991 has plenty of power, with plenty of torque. The three-speed transmission permits selection of the correct / maximum torque for the application. This is a great feature, enabling versatility for one drill to serve three applications, low/medium/high speed or torque.
The DCD991 drill has a rotary adjustment collar with 1 through 11 clutch setting detent positions, for fastener driving and also has a drill detent position, for drilling w/o the clutch function.
The automatic 3-function LED illumination is handy and intuitive. The low and medium intensity modes turn off automatically after 20 seconds. The high / spotlight mode runs for 20 minutes.
My preference has always been for a keyed chuck, but those are also gone the way of the dinosaur. I hate when a chuck / drill bit slips and there is no way to get it any tighter. So far I like this keyless chuck. The audible / felt clicks when hand tightening appear sufficient. IMO, the instructions go waaay overboard "disconnect tool from power source when changing accessories". I put the Forward / Reverse switch in the center off position, instead of removing / replacing the battery pack whenever I need to swap a bit.
The wobbly / sloppy fit between the battery pack and tool is not great, but I knew about that deficiency before purchase. IMO, DeWALT should improve this part of their design.
The hard case is a useful feature of the kit. I prefer the protection it affords and everything having a place. The cover rib contacts the tool when closing, requiring either extra force to fully close, or pulling the top handle away from the hinge so the top cover internal rib clears the tool, so it may close. (Not a major issue, but should / could be improved). The other hard case improvement I would love is for additional room within the case for accessories. I would love to also store my drill bit index, plus other drill accessories within the case. This hard case doesn't have room for other stuff. All I could fit within the case is a small 13-bit drill index case, near the charger base. It would be great if some of those cool DeWALT bit cases had a dedicated location in the drill case.
The battery must be snapped into the charger, not just slid until the light changes, or it won't charge the battery pack.

-
1
-
-
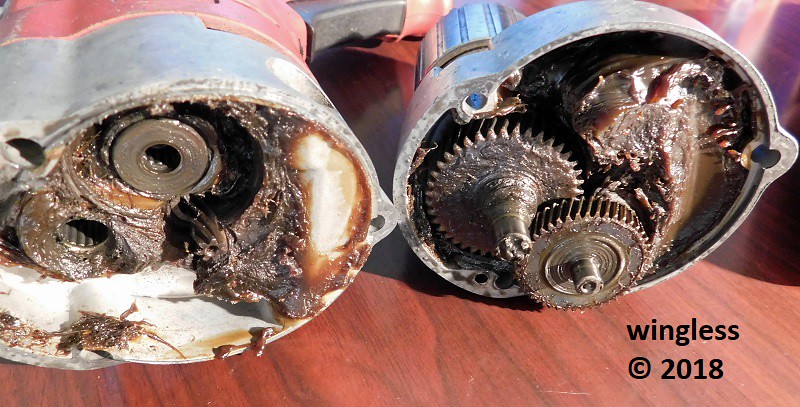
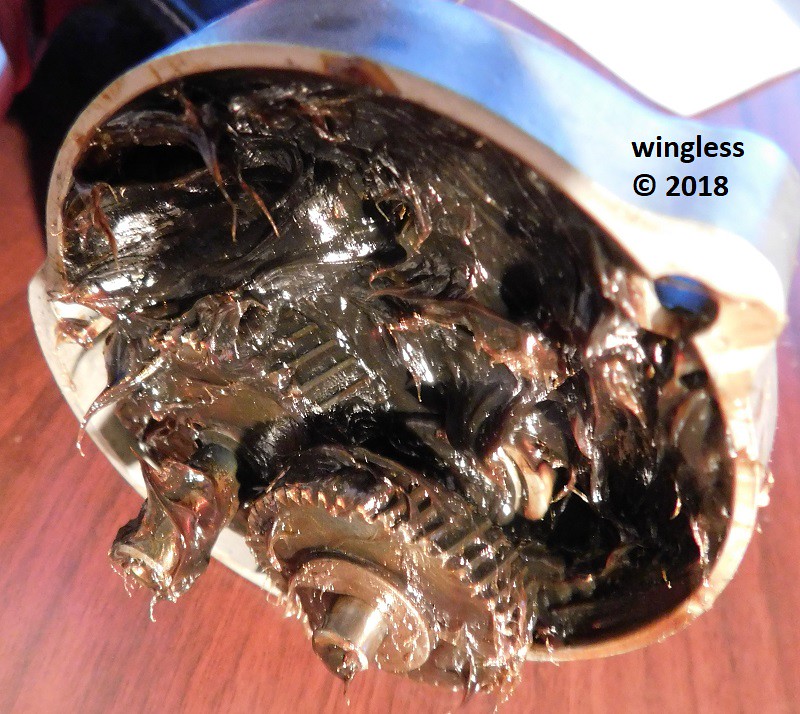
The gear lubrication in my Milwaukee 0224-1 Magnum 3/8" 0-1,200rpm hole shooter was over 30 years old.
The Product Support Bulleting TIY #383 specifies that the correct lubricant for this tool is Type E grease.
A one pound tub, part number 49-08-4122 was purchased.
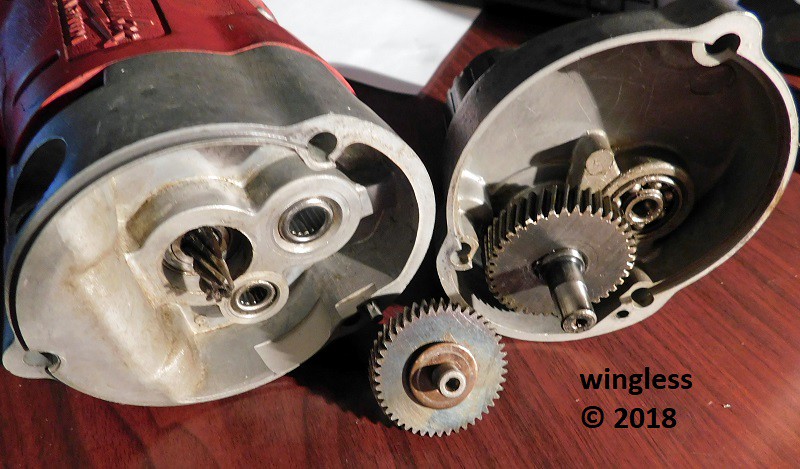
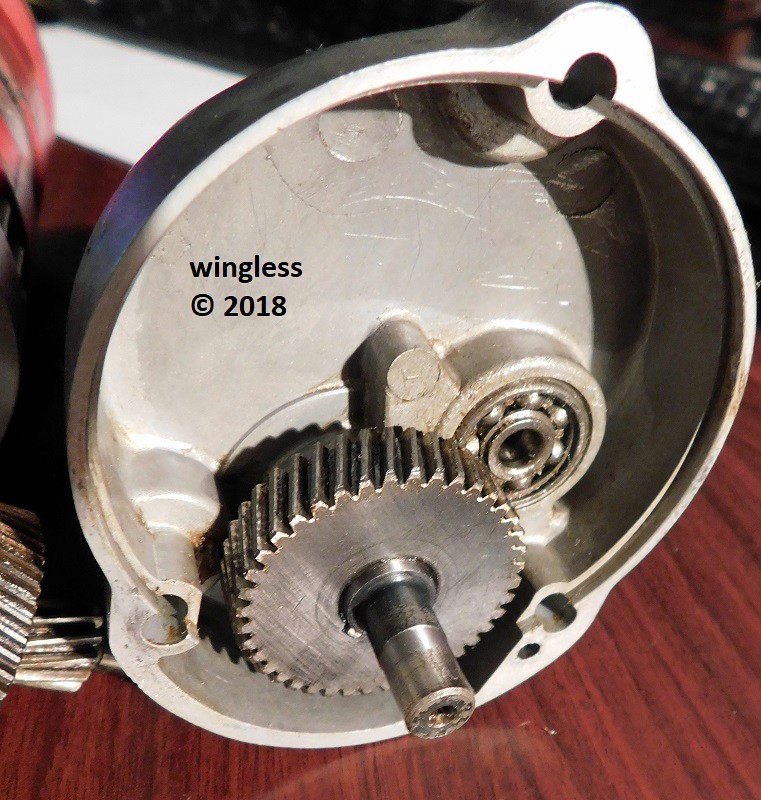
The gear case was opened by removing the front three screws. The old grease was removed. New grease was forced into all the bearings by hand, then deposited around the case in a manner similar to the old grease. The case was then reassembled.
The tool has a very nice feel now.


-
1
-
-
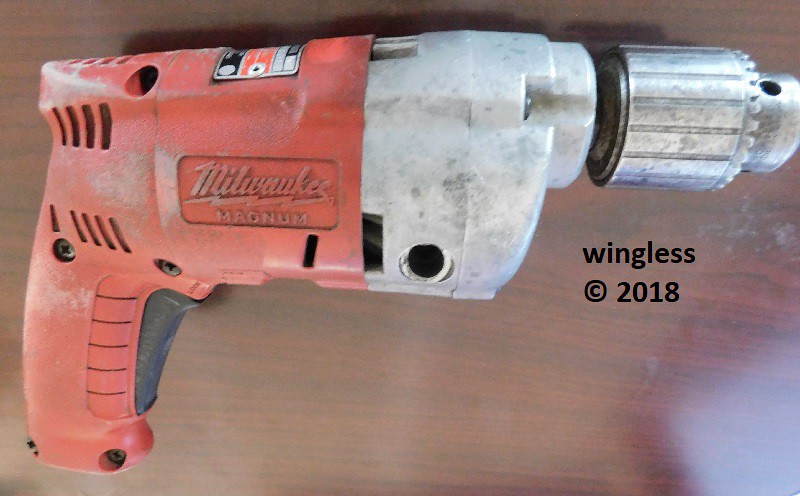
My Milwaukee 0224-1 Magnum 3/8" 0-1,200rpm Hole Shooter was purchased new in April 1988. It has been a strong / reliable homeowner's tool for over three decades.
A recent home project included tiling 3,000 square feet of flooring. This drill was used w/ an auger to mix dozens of bags of mortar. That extraordinary "continuous" extended load burned up the variable speed part of the drill.
Fortunately the drill was still operational. It failed to operate as a variable speed, but continued to operate in full speed mode.
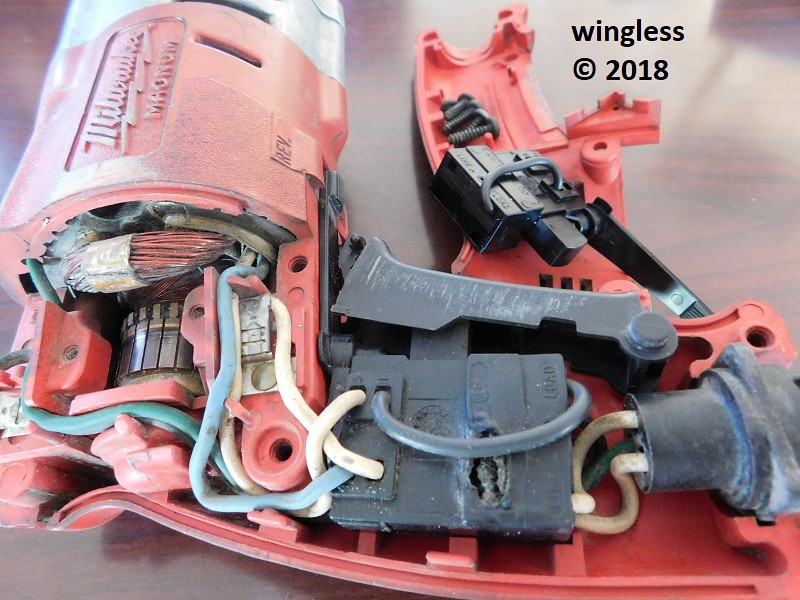
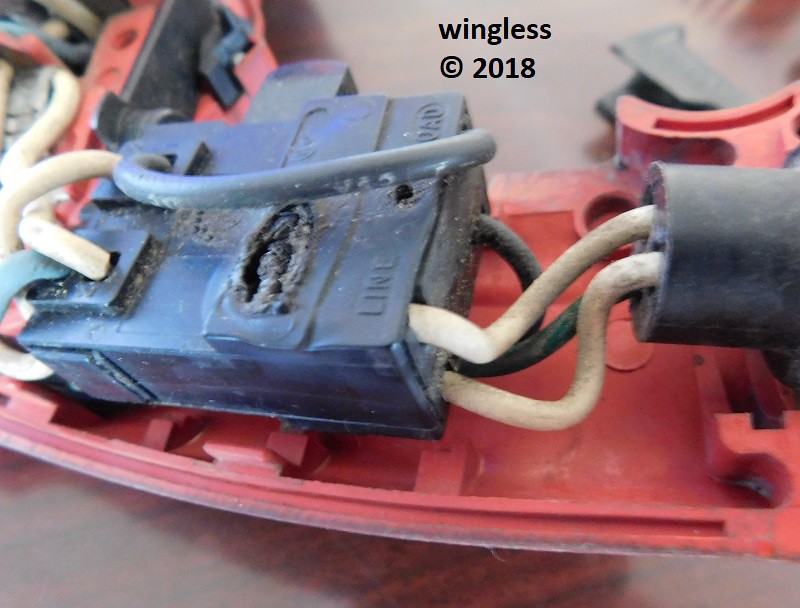
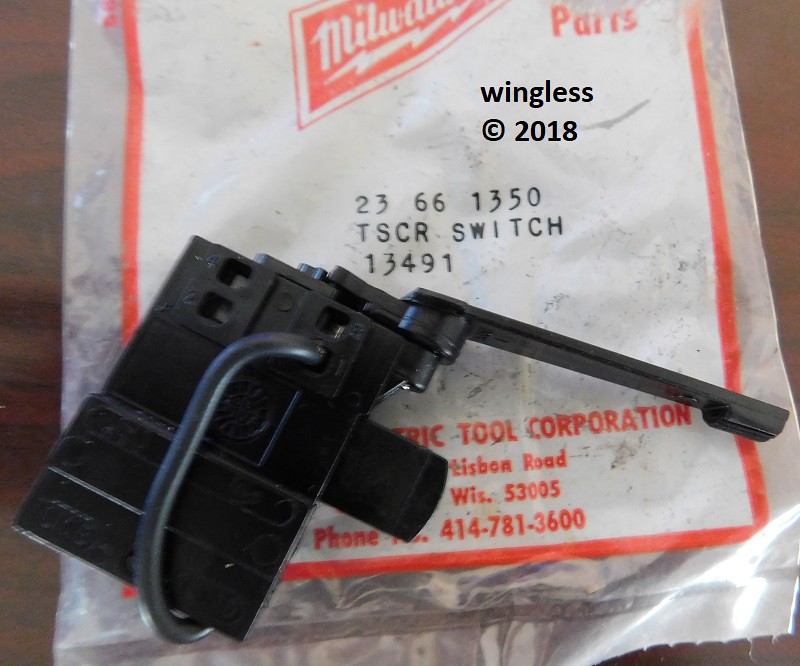
In this early generation drill, the speed controller part is embedded within the currently discontinued / obsolete 23-66-1350 trigger switch assembly. An image of the original switch shows bubbled up plastic heat damage, where that internal speed controller part is located, within the trigger switch. That obsolete part was located then installed, now normal operation has been restored.
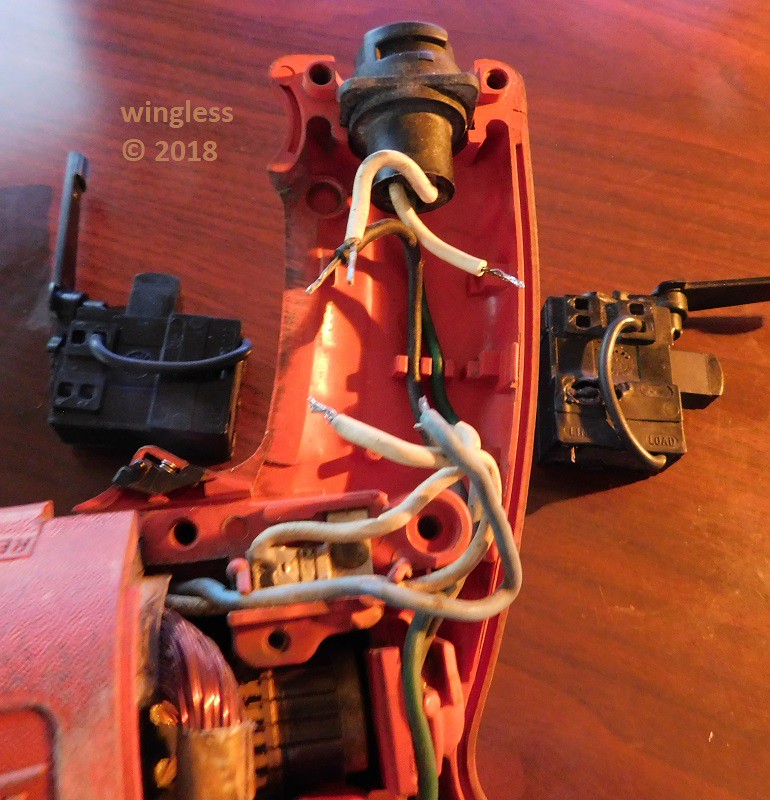
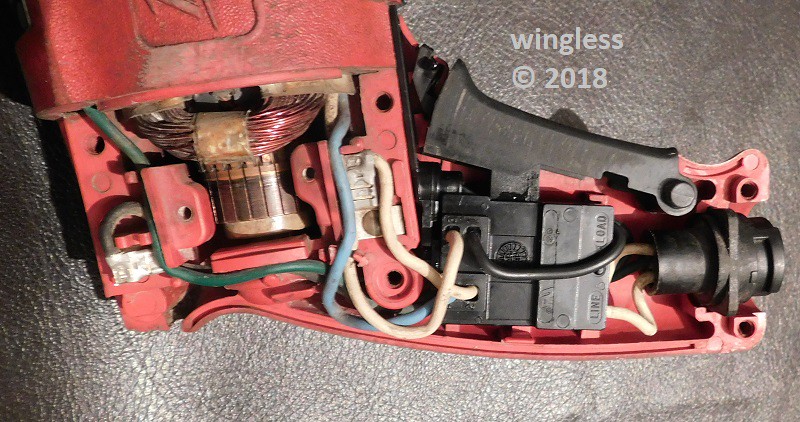
The assembly drawing / BOM for this early drill was located. That document number is: Bulletin No. 54-06-0227. I was unable to locate the Wiring Diagram for this early drill. That document number is: Wiring Instructions 58-01-0072. The only wiring instructions I found were for the slightly newer drill, using the separate 14-20-0245 speed controller part, not appropriate for my drill. To that end, I took lots of photographs during disassembly to ensure I could replicate the wire placement / routing during reassembly. Edit: The 58-01-0072 Wiring Diagram document has been located.
The only difficulties for this repair was the removal / replacement of the poke-in switch wires. The ends of these stranded wires are soldered, to maintain the strands as a solid cluster. This early-generation switch doesn't have a secondary hole for releasing the wire retention tang.
The wire removal from the old failed switch was easy enough, a light constant pull force while partially rotating the wires back and forth on an arc.
The wire installation into the new switch didn't initially go smoothly. The wires are not stiff enough to overcome the wire retention tang, making it impossible to force the wires into position. A slender jeweler's screwdriver was used to open the wire retention tang. While open, the wire was forced into position, then the screwdriver was removed, leaving the wire retained by the tang.
-
1
-
-
When I designed then fabricated my [URL=[URL=http://forum.sailrite.com/wingless-custom-enclosure_topic2801.html]]custom boat enclosure[/URL], part of that project included setting snaps of various types.
The tool I selected for that project is this [URL=http://hooverproducts.com/interest.htm]Pres-N-Snap tool[/URL] with the appropriate dies.
The tool has performed flawlessly in varied and difficult applications.
-
It may be possible to reveal marking on the flat steel face(s) near the jaw.
There have been instances where I've had luck exposing / revealing faint manufacturer's markings by flat surface scraping using a hand-held utility knife blade.
-
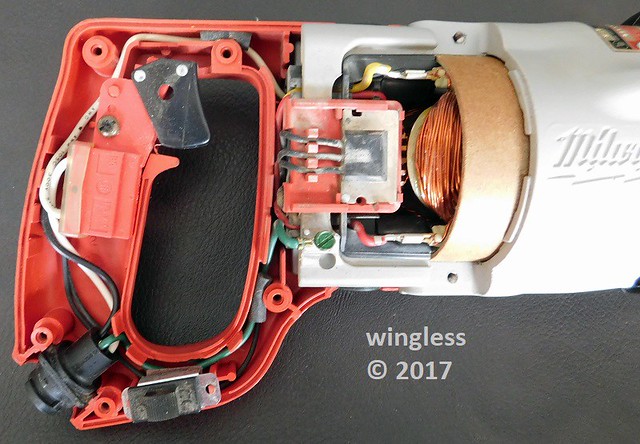
My 6527 Super Sawzall died. I would squeeze the variable speed trigger, nothing would happen. The HI / LO switch had no effect. The tool was dead.
The brushes were removed, inspected, found to be good, replaced, the tool was still dead.
The reciprocating shaft moved fine when manually pushed and pulled.
The top half of the red clam shell handle was removed to expose the tool electrics. The only exposed voltages that could be measured are the windings w/ the red and with the yellow wires. I found that there was not voltage on those windings when the tigger was squeezed. Everything else had concealed / protected electrical wires that cannot be measured using a voltmeter w/o disconnecting parts.
A non-contact electrical AC voltage "sniffer" was used. It showed the expected AC voltage on the black wire from the power cord connector to the variable speed trigger switch. Both black wires out of that switch, one to the HI / LO switch and the other to the speed controller did not have AC voltage when the trigger was squeezed.
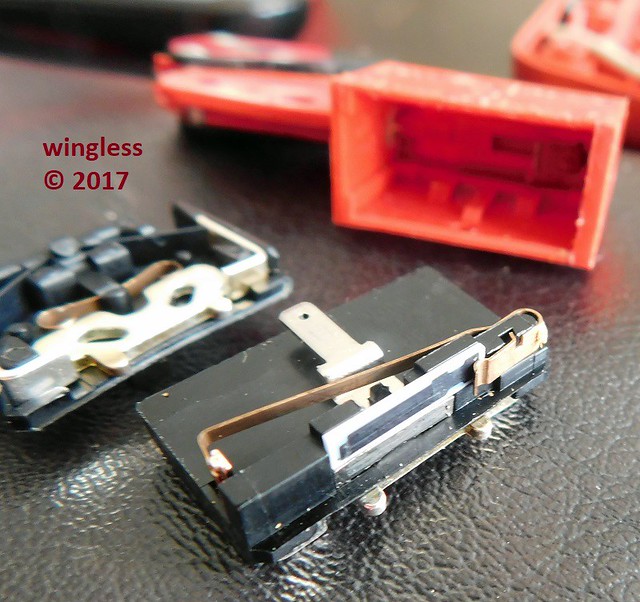
That "sniffer" test lead me to conclude that the 23-66-1490 variable speed switch was defective. The wires to the switch were disconnected and the switch was removed. Note that the easy way to remove the wires is to insert a small probe into the wire cavity. A jeweler screwdriver works well to release the spring tang holding / retaining the wire conductor within the switch.
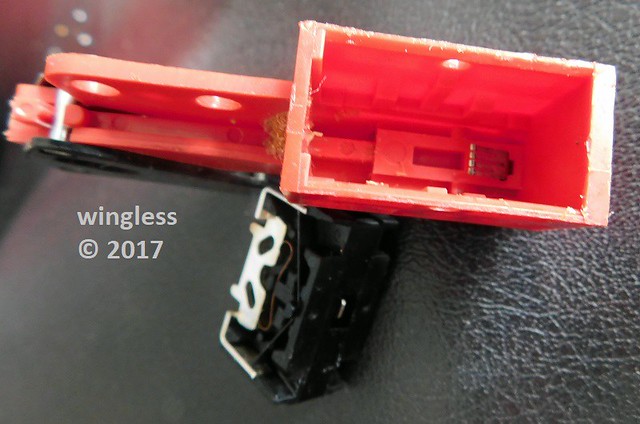
Once the variable speed switch was removed, it was disassembled. The disassembly is easy. There is a post on each side of the body. I used a pair of loose utility knife blades to pry the body away from the posts so the switch guts would be released.
When the switch guts are out of the switch body, that reveals a conductive / resistive surface and a wiper that drags across that surface. I used Isopropyl alcohol to clean both the surface and the wiper. All the switch guts parts were replaced at the correct locations and the switch was reassembled.
The tool wiring was restored to original connections, the switch was screwed back into position and power was applied.
The tool now works again!


wingless' Accessories
in Accessories
Posted
DeWalt DWMTCIR20 Magnetic BlackTough Case
The DeWalt DWMTCIR20 magnetic case is a very handy enclosure. The exterior dimensions are 7" x 2-3/4" x 1-3/4". The empty mass is: 6.0 oz.
This slender case is easy for pocket storage.
The hinged clam shell case top cover opens just past 90°, so gravity keeps the cover open. The cover / base has a rib and corresponding groove around much of the perimeter to limit exterior contamination intrusion.
The case has a pair of strong magnets (plus rubber strip) on the lid for attachment to a metal surface. The base has a channel to grab onto a rib.
The case interior has a label with this very handy text: "CAUTION: Extremely Powerful Magnet. Keep Away From Pacemakers, Defibrillators, Medical Equipment, Computers, Computer Discs, Cassette Tapes, Engine Control Modules, Etc. When Using Vertically Or Upside Down, Weight Of Items In Tray Must Not Exceed Magnet Strength."
There is a metal draw down latch.
There is a full-length metal hinge rod on the piano hinge. This appears very sturdy for long-term strength.
These bits are Impact Ready, rated for impact driver usage. The impact rating on these DeWalt bits is visually indicated by the black surface finish.
The kit includes 20 bits, all are ¼" hex drive, the longer ones have the power groove retention radius on the ¼" hex shank. These are: 3½" magnetic pivot holder; three magnetic nut drivers; four 2" bits, ten 1" bits and two drill bits. The pivot holder uses an internal expansion ring to grab / retain the bit, when new it is kind of difficult for bit insertion / removal. It has an exterior sliding collar that changes it from straight drive to pivot drive.