


wingless
-
Posts
710 -
Joined
-
Last visited
-
Days Won
74
Content Type
Profiles
Forums
Events
Posts posted by wingless
-
-
My 2000 Searay 380 Sundancer was built from the factory with the optional 200' all-chain rode.
This was a great option, with terrific holding power under lots of conditions. I built a snubber w/ a hook to hold the chain / absorb the shock during usage.
There was a silent problem occurring, with the delamination of large sections of gel coat inside that anchor locker, that then clogged the two drain weep holes, causing rust near the bitter end of the chain.
There was also exterior rust stain dribbling on the hull exterior below the drain weep holes, but it wasn't possible to see the interior problem, concealed below the anchor chain.
An examination during the problem resolution, of my empty anchor locker revealed the exposed bare fiberglass hull to have a glossy surface, making gel coat adhesion difficult.
My guess is operation during rough conditions had the chain bumping around, breaking away the poorly bonded gel coat. There were large sheets of loose gel coat, with pieces many inches long.
My solution was to first scrape away whatever was possible to remove with a paint scraper.
The next step was to vacuum sand the exposed fiberglass hull and to sand away any gel coat that was possible to remove without difficulty.
All of the problem areas were above and below the internal loop eye, on either side of the centerline of the boat.
That exposed bare fiberglass was painted with epoxy.
A fitted plastic "wood" slatted shelf was made for the floor to space the rode an inch above the drain weep holes, while permitting the rode to drain / shed water and air dry.
The rode was exchanged from all-chain to rope / chain. When I removed the original 5/16" chain it filled two five gallon buckets. Each bucket was very difficult to move because of the weight. My entire new rope / chain rode can be moved by me without difficulty.
A cardboard template was created that fits the shape of the locker, an inch above the base. A tee bevel was used to get the internal hull slope.
My Ridgid 4511 granite table saw was used to make all the compound cuts for this new plastic "wood" floor.
The end result is exactly what I wanted. Now I don't have to worry about the drain weep holes being blocked. Everything will stay dry. Nothing will be beating on my hull. LOTS of weight was removed from the bow!
Initial Condition - Chain Rode Removed
Shelf Location Marked w/ Tape

Cardboard Template Created / Fitted

Ridgid 4511 Granite Top Table Saw Ripping Frame to Match Hull Slope

Base Frame Parts w/ Cuts Permitting Bending to Match Hull
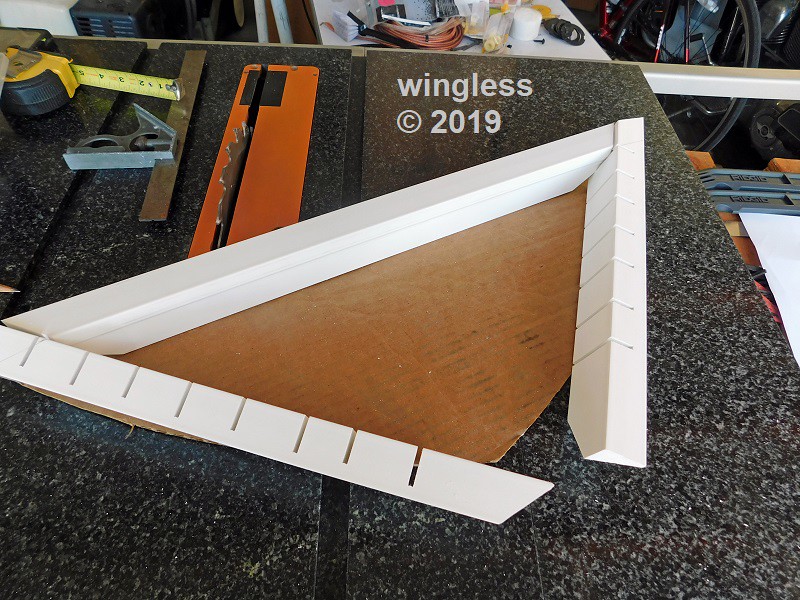
Base Frame Trial Fit To Anchor Locker

Base Frame Covered w/ Slats to Full Locker Width
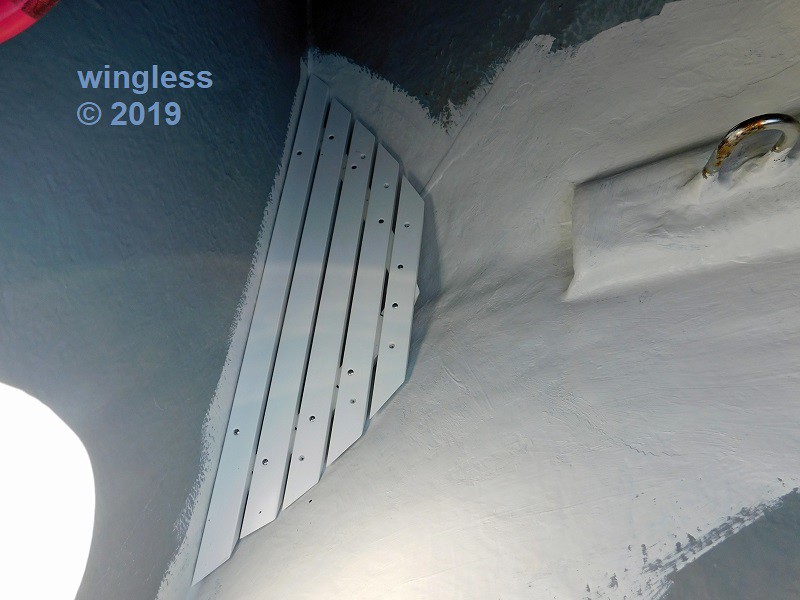
Platform w/ Extended Nose Added Covering Forward Gap

Glossy Hull / Loose Gel Coat Sanded Prior to Epoxy

Bare Hull Covered w/ Epoxy

Anchor Rode in Completed Locker

-
 1
1
-
-
My Milwaukee 5460-6 11 Amp 0-1,750 rpm 7"/9" polisher has been a reliable workhorse tool for many years.
https://www.milwaukeetool.com/Products/Power-Tools/Metalworking/Sanders-and-Polishers/5460-6
This tool has a detachable 10' Quik-Lok two-prong power cord, a side handle (goes on either side) and a 7" rubber backing pad w/ retention nut.
The tool has a variable speed trigger AND a variable max speed knob. The combined usage of both controls is intuitive during usage. These controls are well placed.
The tool has standard 5/8"-11 spindle threads and a spring-loaded push button spindle lock, for quick / easy pads changes.
My tool has been "easy" to maintain the exterior clean, but the fiber pads were accumulating interior contamination, so I disassembled for interior cleaning. I removed the handle screws, then removed each handle half. The tool rest was also removed, cleaned and replaced. The gear box was not disassembled. I instead pushed a rag through the openings to clean those wide narrow openings.
Now it looks good through the vents again.


-
Welcome to the forum.
That activity is going to be difficult.
A drill press may assist the effort, to have the drill to part angle and position maintained better.
This link shows my Irwin 11119 extractor w/ Cobalt reverse twist bits. These have been used several times with great results.
I don't have any hesitation recommending this kit.
http://forum.toolsinaction.com/topic/14363-wingless-accessories/?tab=comments#comment-200814
Keep the replacement parts greased to prevent seizure.
-
On 2/7/2019 at 4:46 PM, wingless said:
My tool has the 2.3mm (0.090") riving knife w/ spring-loaded anti kickback pawls, but is missing the clear plastic blade guard. That missing / discontinued part is not available to purchase.
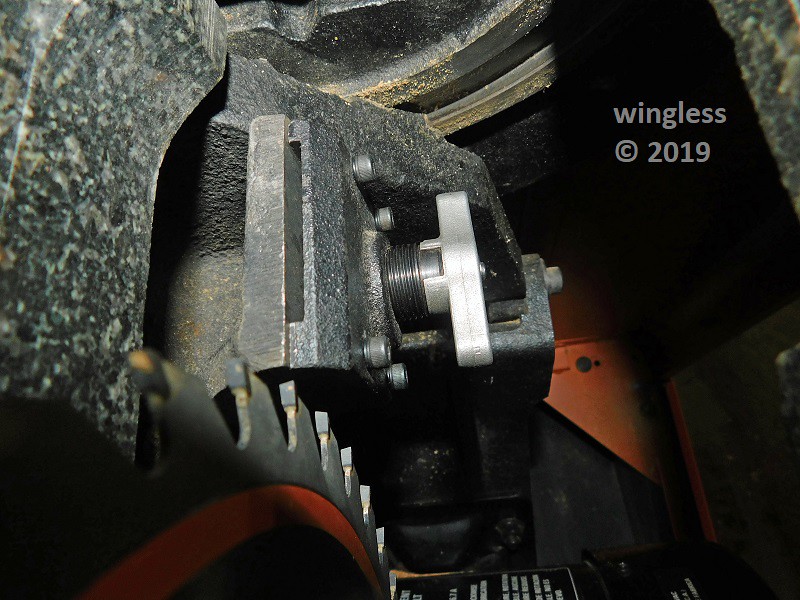
A NOS riving knife / blade guard was located and purchased.
The steel thickness on this particular riving knife was too thick to fit into the slot, but the blade guard and arm were scavenged from that thick riving knife, added to my existing riving knife (missing the blade guard) and are a perfect fit for my saw.
A hook was fabricated from a threaded eye bolt, then added to the rear of the saw cabinet to hang the blade guard assembly.
Not shown, a straight stem was also fabricated from a threaded eye bolt and added to the opposite rear cabinet corner for hanging my push sticks.
Now all is good with my complete saw.


-
There is an excellent factory document specifying the correct lubricant for Milwaukee tools. This is linked in my forum reply.
If DeWALT won't specify the correct lubricant, then find an equivalent Milwaukee tool and use their lubricant.
-
Welcome to the forum.
A visual inspection reveals intact parts.
Try removing the circuit board and also providing an image of the bottom of the circuit board, the solder side of the circuit board.
If this were mine, my first step would be to use my multimeter and measure the fuse, using Ohms and verifying that the fuse has a low resistance, under 5 Ohms.
-
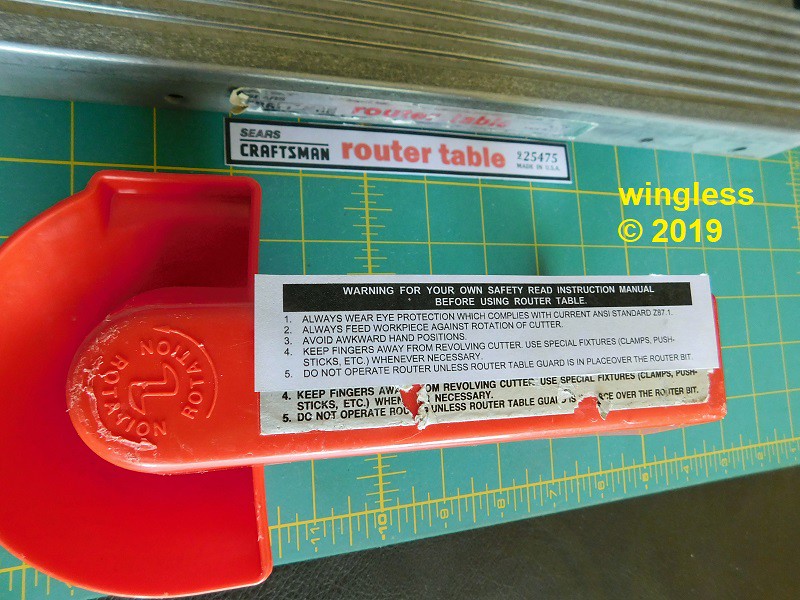
On 3/4/2019 at 9:25 PM, wingless said:
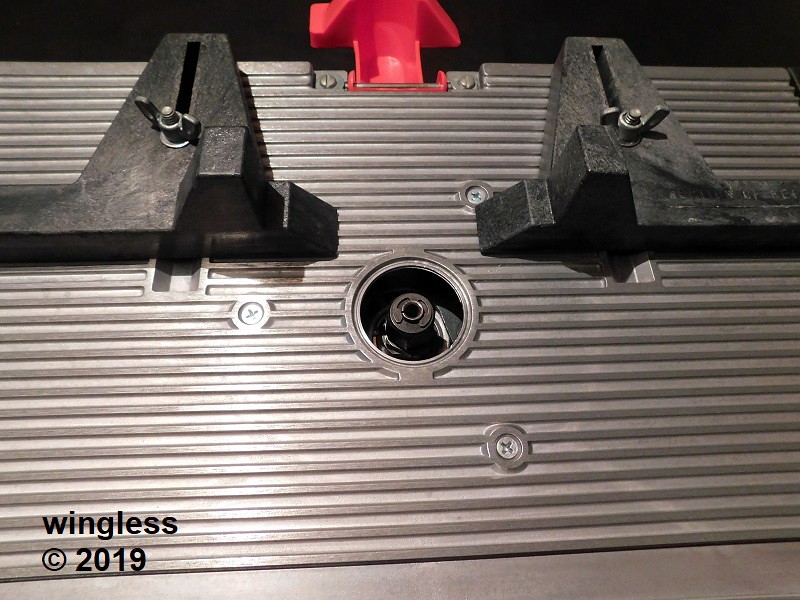
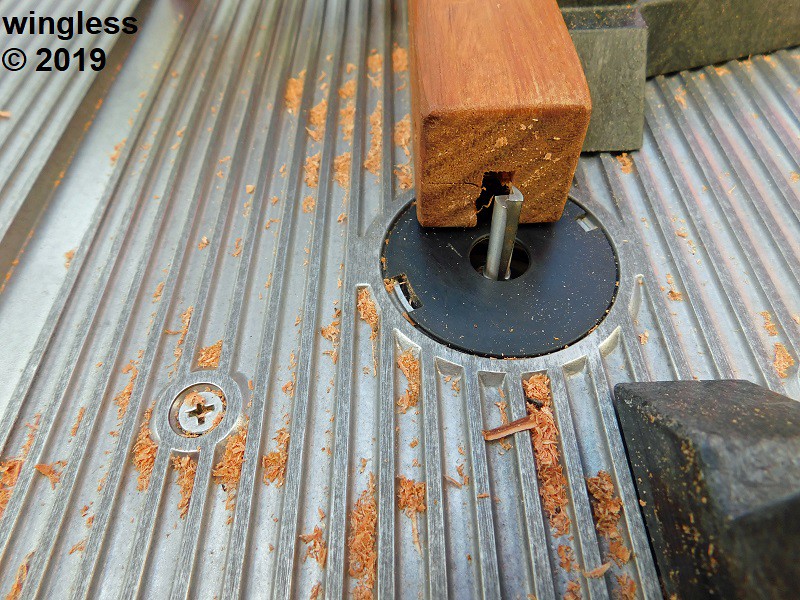
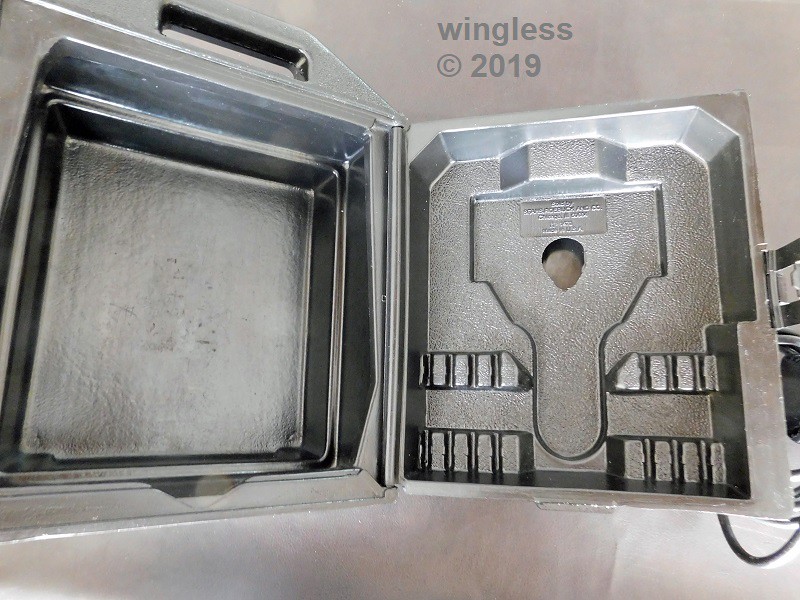
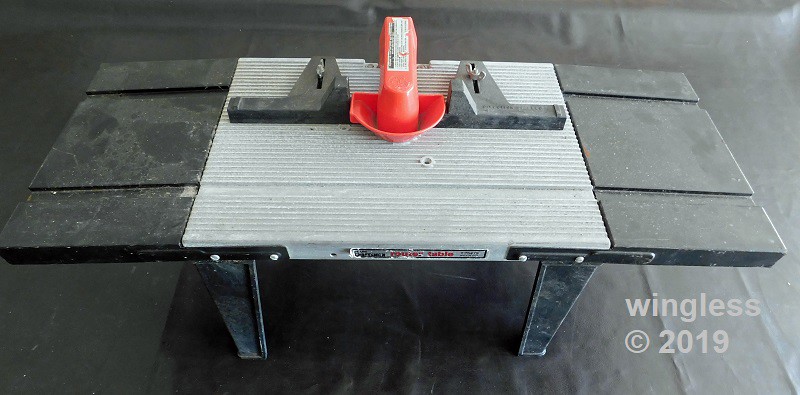
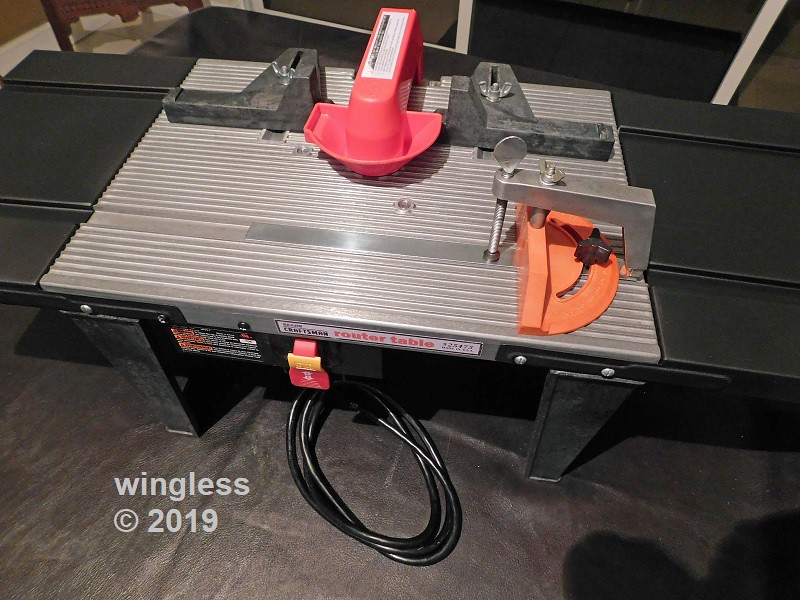
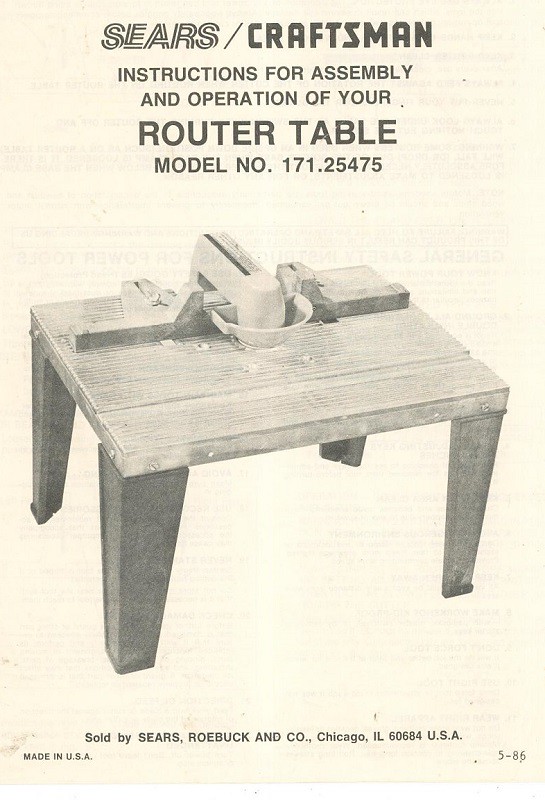
My (new to me) Craftsman 171.25475 router table was mostly complete and in good condition. It was missing the 29L-202 / 1609441472 2" OD router table insert set that is no longer available for purchase.
Now I've got a really nice / old router table. All I'm missing are the 2" OD table inserts.
Router Attached to Table
29L-202 / 1609441472 Unobtainium Table Insert Set
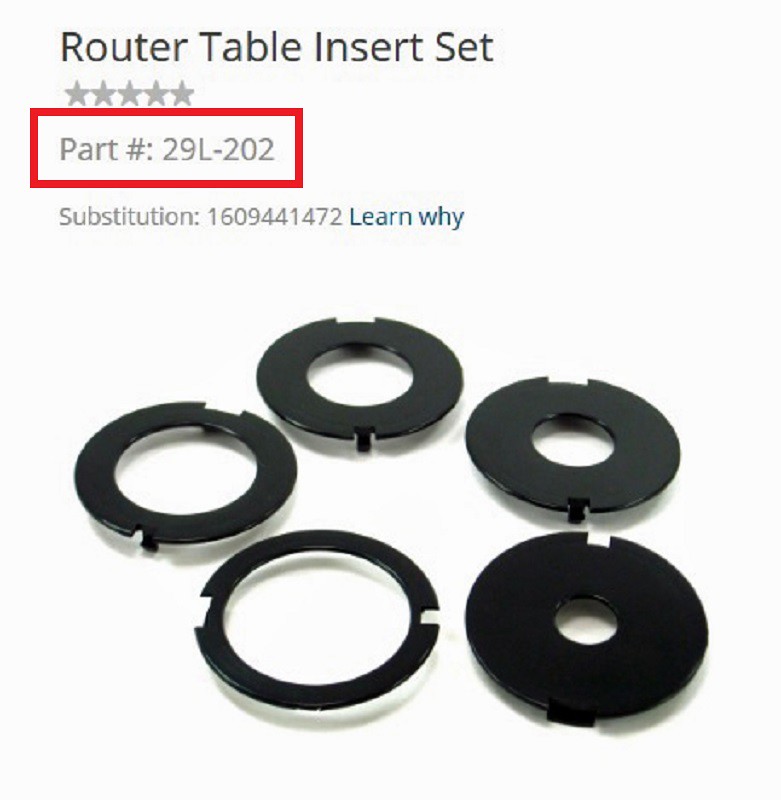
That 29L-202 / 1609441472 Unobtainium table insert set is not available for purchase anywhere.
There were searches on Craig's List, eBay and Offer Up. Sellers having those parts with a table would not sell just those parts.
The Search All of Craig's List site found a seller on the other side of the country selling a table with those inserts for a reasonable price. I negotiated a purchase for just the inserts, sent him cash and a prepaid shipping label. A few days later I had my parts.
Now all is good.
-
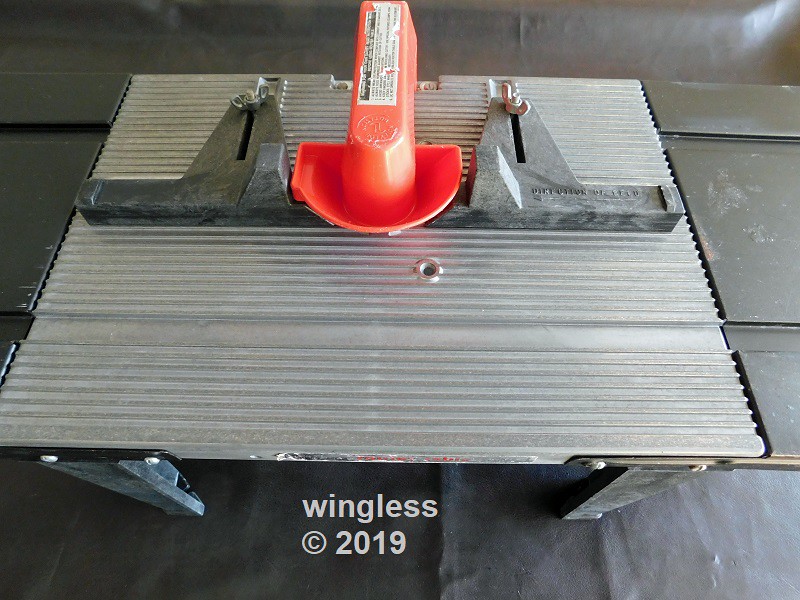
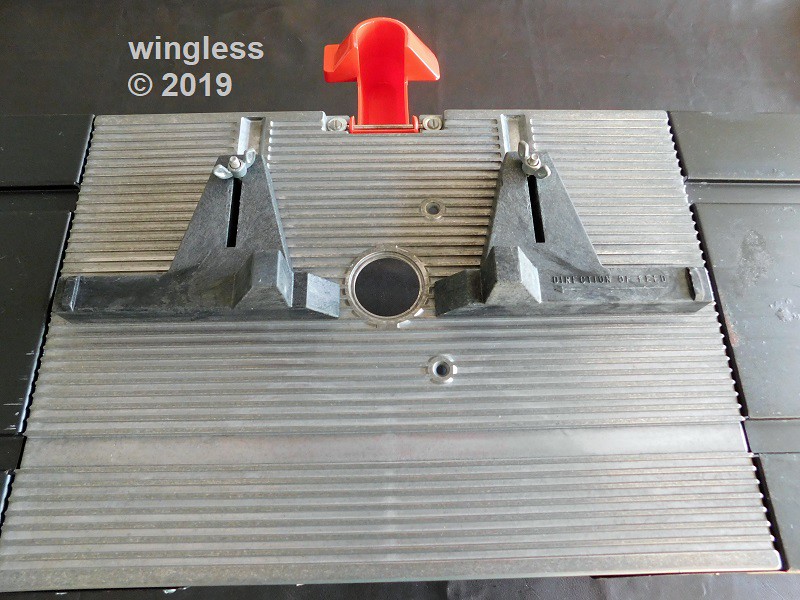
Here are some more images of the completed router table and the final labels.


-
Welcome to the forum.
This DeWALT impact driver would be a good single tool for your drilling and screw driving usage.
An impact driver is vastly superior for driving screws in or out than a drill . With an impact driver the screw is driven w/ virtually zero damage to the head.
If going this route, get this tool as a kit, with the two batteries, charger and case. The cost to add these items afterwards to a bare tool is significantly more than the kit cost.
The linked Bosch MP500T carbide drill bit set and Milwaukee Shockwave drill bit set provide coverage in the drilling arena.
There are several bit holders that are part of my kit. My go to bit holder is this DeWALT DW2507. I like the insertion / ejection action.
No, this is not a drill. so it doesn't have the wide versitality of a drill, but for single tool, with the limited usage described by the OP, this is a very nice fit.
-
Overkill.
That hammer drill would be great for masonry.
Get a cordless impact driver for screws. Use that for drilling or get a cordless drill for drilling.
-
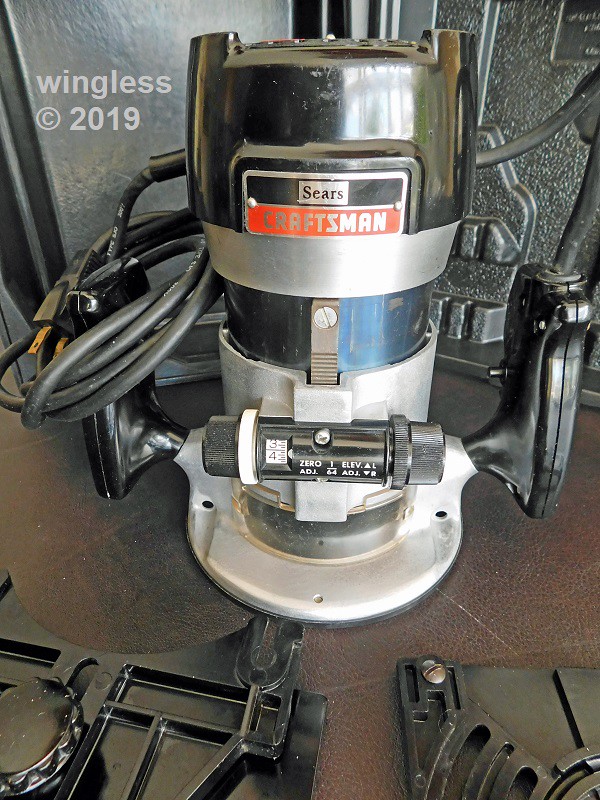
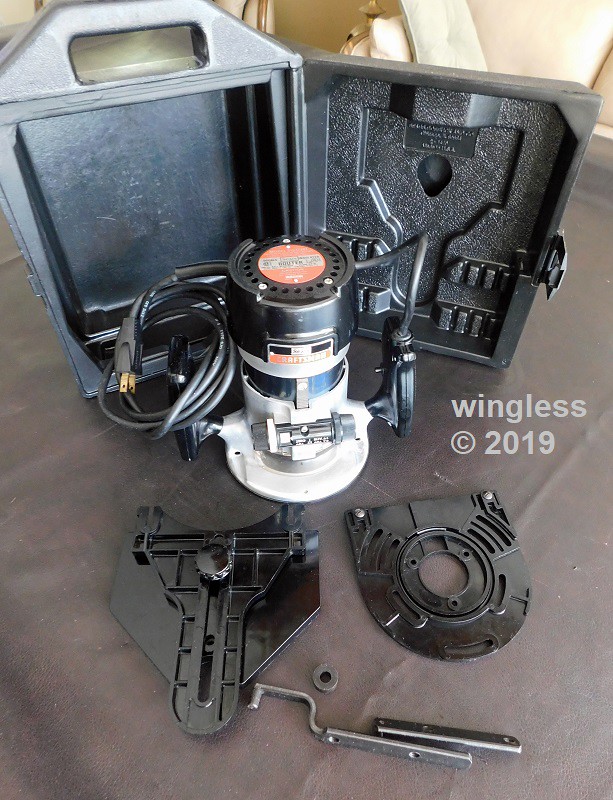
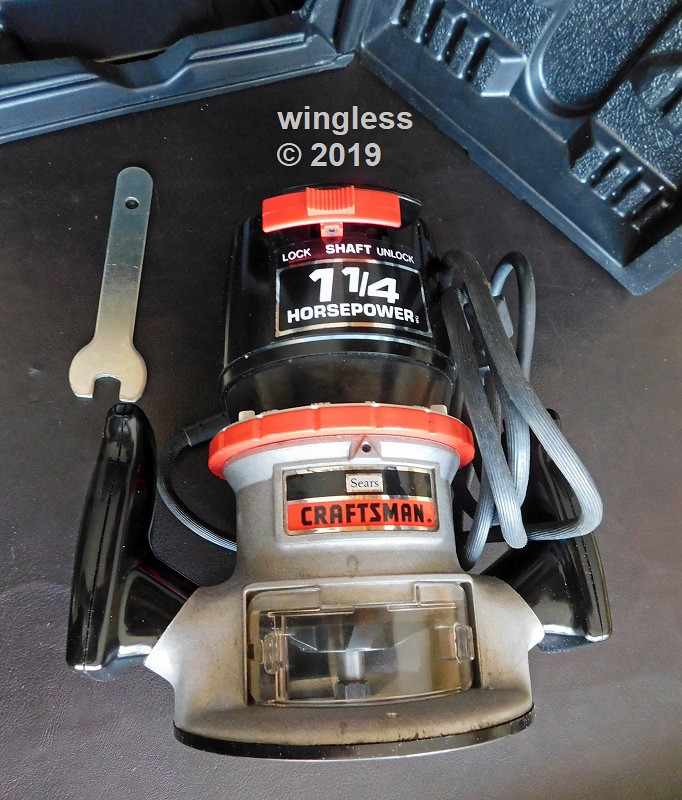
A long time ago I had a really nice Craftsman Professional 315.17380 router, 14701 case, 9-25444 router table, 9-25179 edge guide and bits that suffered from a long period of inactivity, so they were sold.
There are upcoming projects that require these tools, so replacements were sought and obtained.
It turned out that I ended up w/ two routers, because both were good deals, one with two nice bit sets, the other with the 9-25179 edge guide. I also got a 9-25173 edge guide. Both routers have the nice Craftsman 9-1472 black Permanex polyethylene plastic cases. A router table was purchased separately and is detailed in this topic.
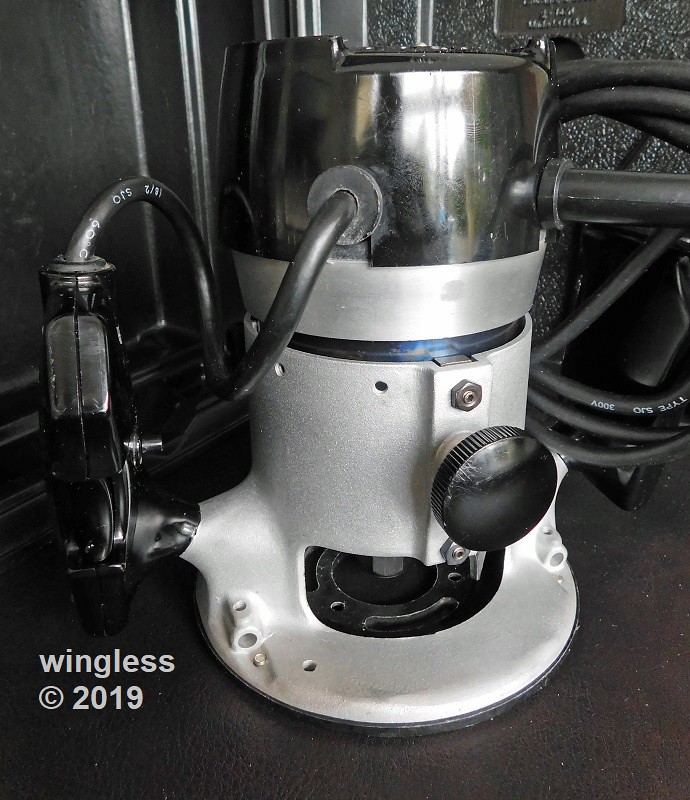
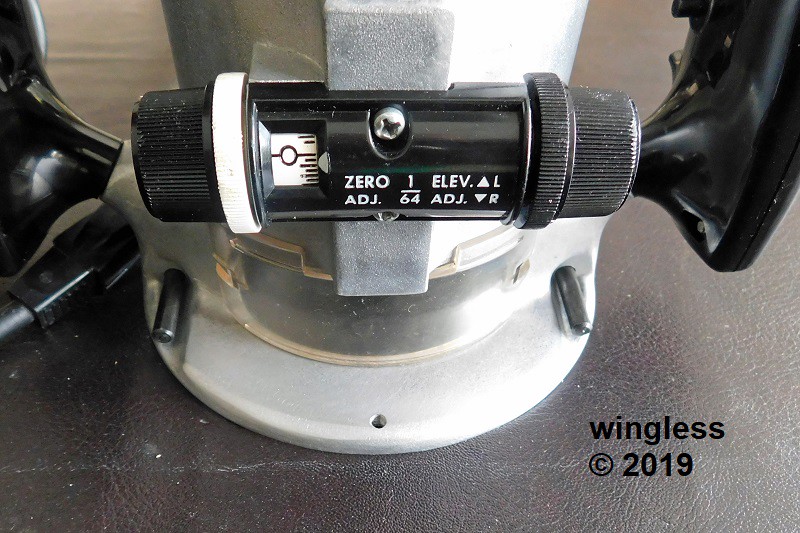
One tool is the Craftsman 315.17381 router. This has the micrometer dial style depth adjustment. This also has a pair of base holes for a rod-style 9-25173 edge guide. When I obtained this router, the bare aluminum base casting had black marks, like large black greasy fingerprints, that could not be removed. I tried steel wool soap pads to polish the bare aluminum, but those marks remained. Those marks were removed and the castings restored to a new finish w/ fine grit random orbital motion sanding.
This tool has a nice setup adjustment mechanism. There is a block w/ set screws that eliminate the play / slop between the base and motor, once properly adjusted. The result is a nice up / down movement w/ little / no displacement when locking the setting.
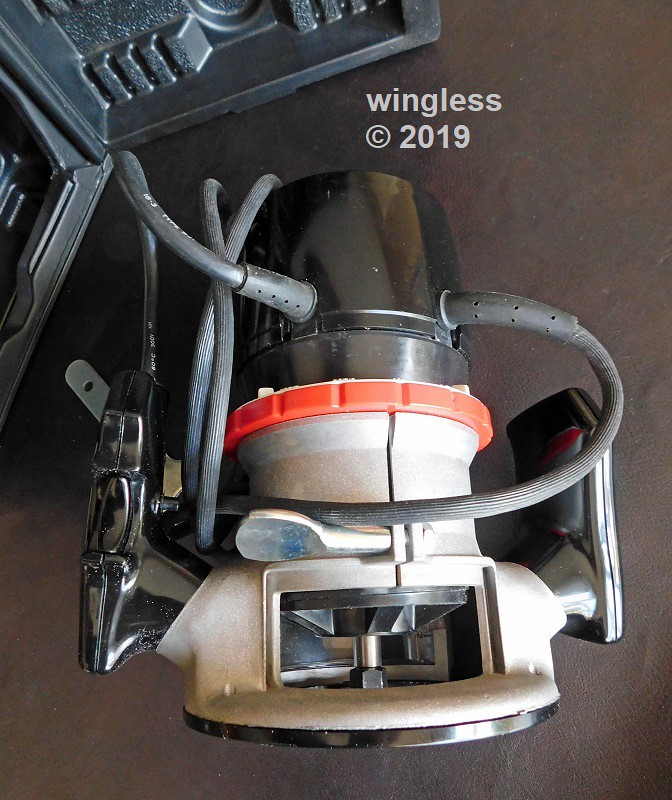
The other tool is the Craftsman 315.17560 1¼ hp router. This has a large rotating ring, around the entire tool circumference to set the depth adjustment. Note that this adjustment style works best in normal orientation, w/ the base on the bottom, motor on top. If the tool is hung upside down, such as in a rotor table, this adjustment ring doesn't work as-intended. This tool also has a bright integrated internal light to illuminate the cutting bit.
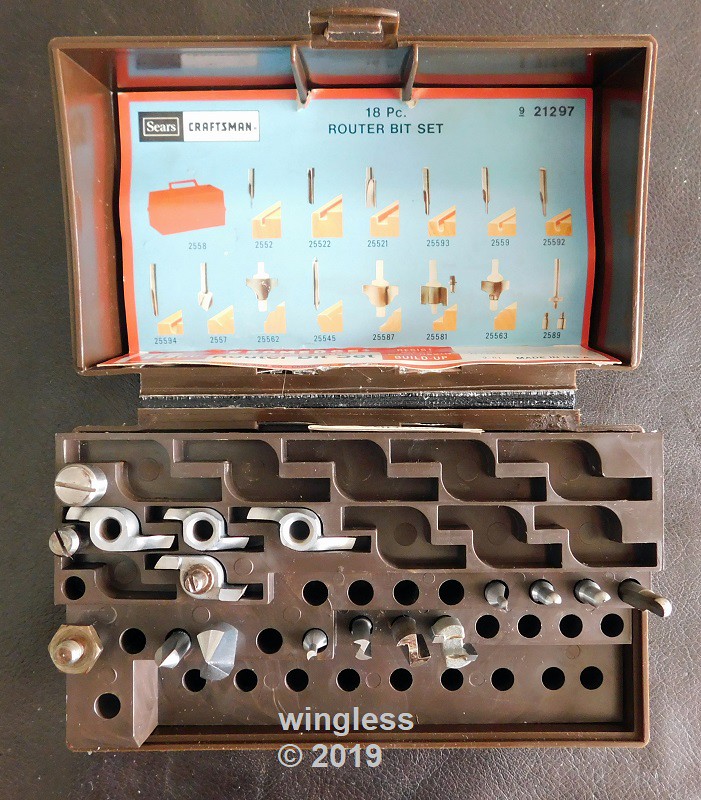
One bit set is the Craftsman 9-21297 18-piece Kromedge high speed steel router bit set. This has a nice case w/ plenty of room for additional bits of different styles and sizes. The flexing plastic hinge on my case failed, so I wrapped the back surface w/ 2" wide heavy duty Velcro and that became my hinge.
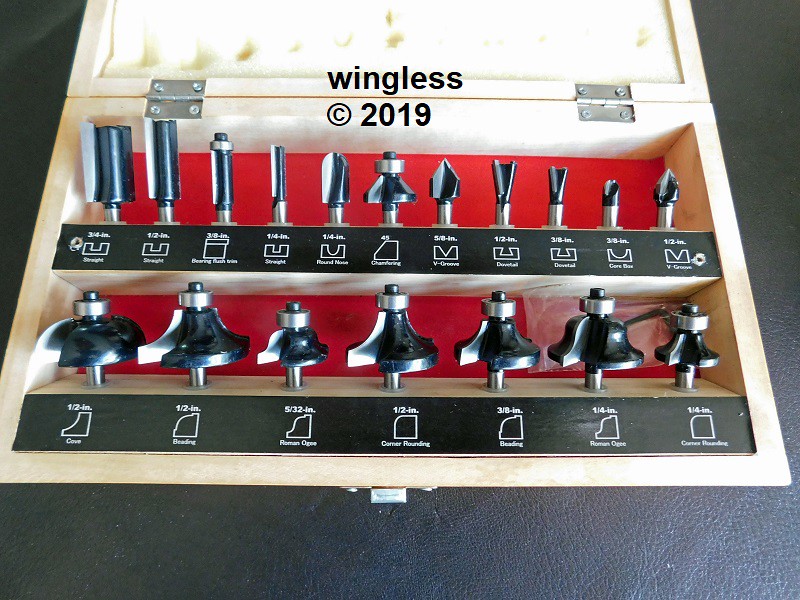
The other bit set is the Mastergrip 480083 18-piece carbide tip router bit set. This has a nice metal-hinge / metal-latch birch wood case, w/ felt lining, foam padding and nylon shaft retention sleeves. The bits w/ guides all have nice ball bearing guides.
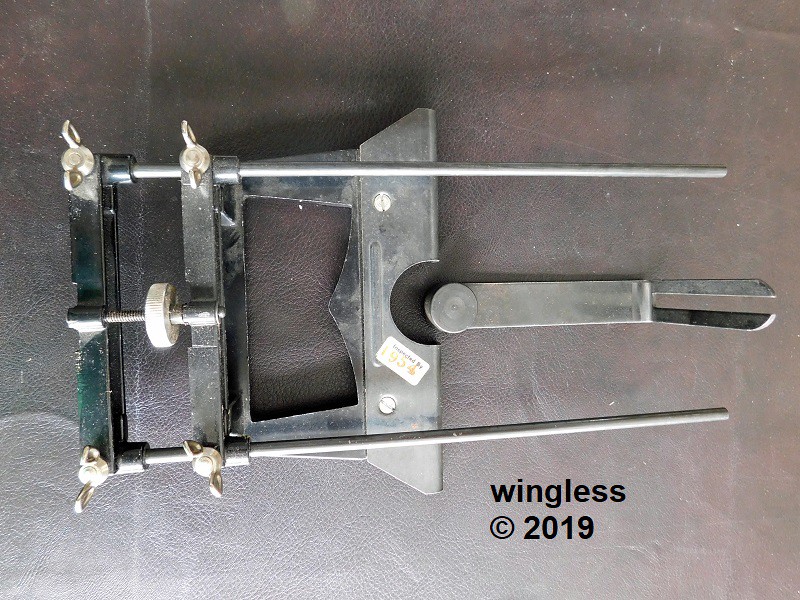
The Craftsman 9-25179 edge guide is a great accessory. The existing router base is removed / replaced with the one from this accessory. The tool can be used w/ this base installed, with or without using the detachable edge guide part. This accessory permits accurate: edge; contour; trim; bevel and full circle cuts.
The Craftsman 9-25173 edge guide is well-designed and integrates nicely with the Craftsman 315.17381 router. The two guide rods fit into existing casting holes in the router. The guide has a really nice fine-tune adjustment knob. This tool has both a straight edge guide and a contour finger guide.
The Craftsman 9-1472 black plastic cases provide great tool storage, have a location for the 9-25119 edge guide and hold 14 router bits w/ ¼" shanks.
Craftsman 315.17381 Router - Craftsman 9-1472 Permanex Polyethylene Case - Craftsman 9-25179 Edge Guide
Craftsman 315.17381 Router - Craftsman 9-25173 Edge Guide

Craftsman 315.17381 Router Base Polished Front

Craftsman 315.17381 Router Base Polished Rear

Craftsman 9-1472 Permanex Polyethylene Case
Craftsman 9-1472 Permanex Polyethylene Case - Craftsman 9-25179 Edge Guide
Craftsman 315.17381 Router - Craftsman 9-1472 Permanex Polyethylene Case - Craftsman 9-25179 Edge Guide
Craftsman 315.17560 1¼ hp Router - Craftsman 9-1472 Permanex Polyethylene Case
Craftsman 315.17560 1¼ hp Router - Craftsman 9-1472 Permanex Polyethylene Case
Craftsman 9-21297 Bit Set
Mastergrip 480083 Bit Set
-
Long ago I had a nice Craftsman router and Craftsman router table. Both suffered from long periods of inactivity and were sold. There are some upcoming projects where these tools will be useful, so I found / purchased some nice used examples. This topic shows my new to me Craftsman routers.
My (new to me) Craftsman 171.25475 router table was mostly complete and in good condition. It was missing the 29L-202 / 1609441472 2" OD router table insert set that is no longer available for purchase. The cast / machined aluminum table had surface oxidation. The optional / extra Craftsman 25211 right / left steel table extensions had minor paint bubbling up from surface rust underneath the paint. The labels on the table edge and on the blade guard had degraded. That 45A-293 label set is no longer available.
One of the great features for this table is the material used for the legs and the fences. The legs and the fences are molded using glass-filled plastic. The glass increases the strength and stiffness of the plastic.
This model router table did not include a sliding miter gauge and did not include a front panel power switch when shipped / configured new from Craftsman.
The aluminum table oxidation did not bother me. I used steel wool soap pads to polish the bare aluminum to a very nice finish.
The steel table extensions were sanded bare then painted, now they look great again.
One thing I didn't like about those steel table extensions was the formed side arms w/ screw holes for attaching to the table have a formed cavity between the arm and the table. That cavity collapses when tightening those screws. I used my shop press to restore the cavity shape, then carefully put small washers into those cavities during assembly, to permit screw tightening w/o collapsing the cavity.
Note that final assembly of the steel table assembly is a two person job, at least on my router table. The extensions are loosely attached to the center table. One person pushes the upside down parts flat onto the surface, while a second person tightens the attachment bolts. This method ensures the extensions are coplanar with the center table. On my table, if the hardware is tightened as a one person operation, the side extensions droop down.
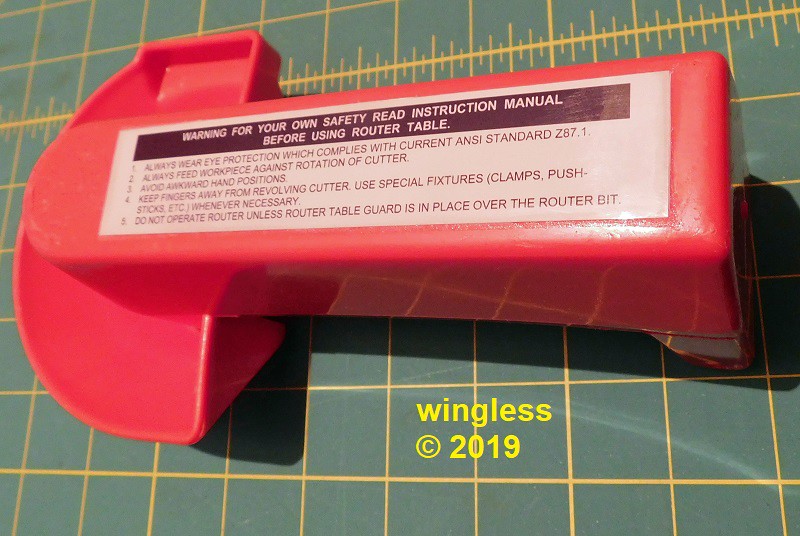
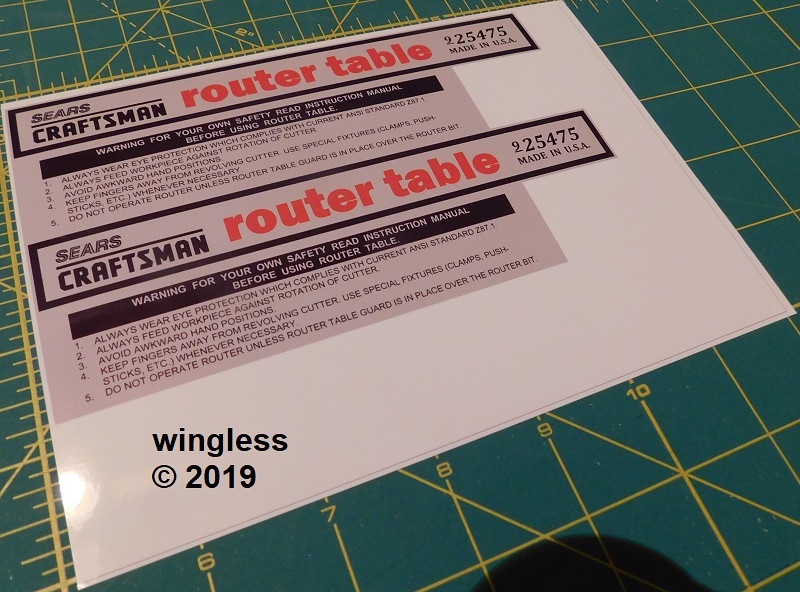
The label artwork was recreated, then printed, adhesive added and these new labels were applied to the router table and to the blade guard. The biggest butt pain was recreating / cleaning up the old small SEARS logo in the top left corner. I used 3M Super 77 aerosol spray adhesive applied to a masked-off area on the table front and on the blade guard so they would stick to the surfaces.
The correct Craftsman miter gauge w/ the optional 9-29504 hold down clamp was located and secured. Same also for the correct Kedu HY75 power switch.
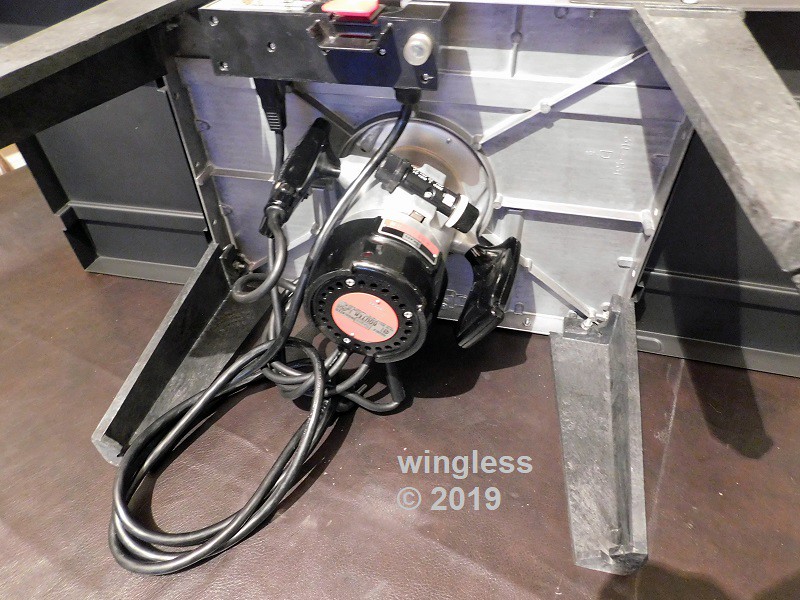
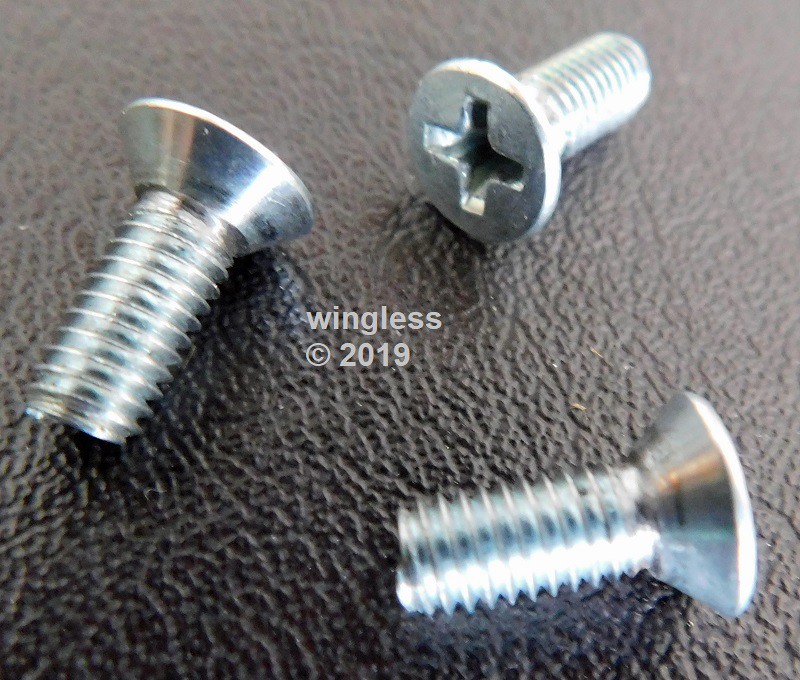
The ½" long 10-32 flat head screws that I picked-up at the hardware store to hold the router to the bottom of the bed did not work w/o modification. I needed to cut back the head adjacent to the threads because the table thickness was insufficient for proper clamping. Now the screws work great. Both the really expensive Craftsman MPP010105023 router screws and my modified screws are shown in the images.
Now I've got a really nice / old router table. All I'm missing are the 2" OD table inserts.
Router Table As-Received
Router Table As-Received

Router Table Polished - Original Labels and Original Table Extension Paint
Router Table Polished - Original Table Extension Paint
Original and New Reproduction Label
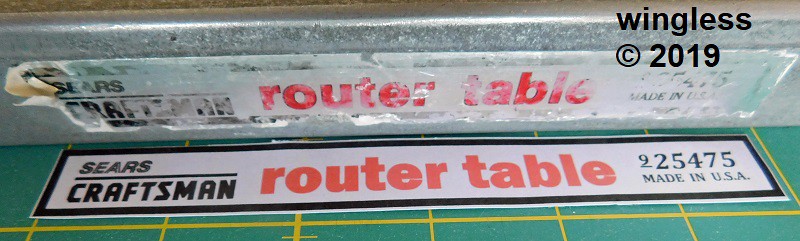
Original and New Reproduction Labels
Craftsman 25211 Steel Table Extensions - As-Received and Sanded Bare
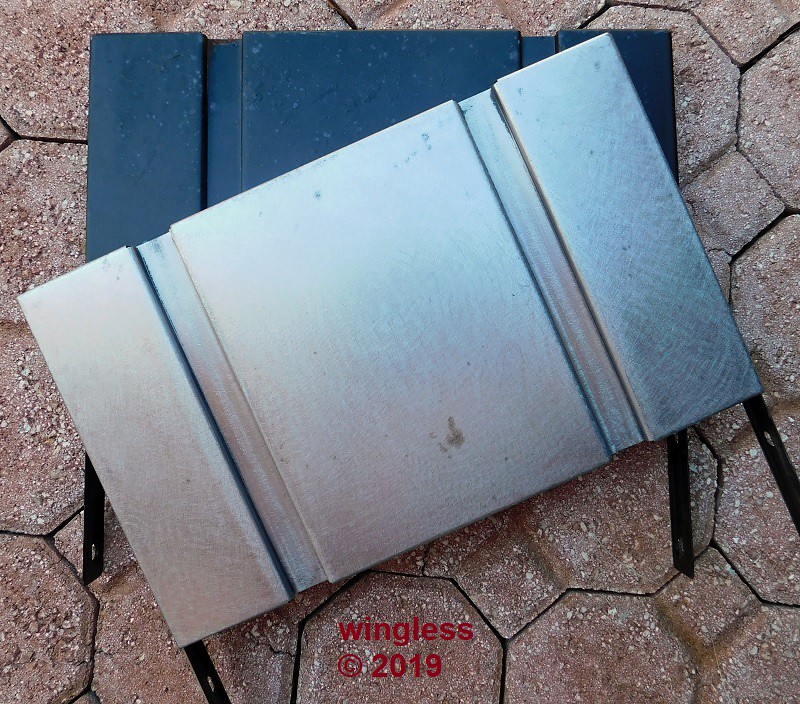
Craftsman 25211 Steel Table Extensions - Sanded Bare

Restored Condition - w/ Sliding Miter Gauge, 9-29504 Hold Down Clamp, Power Switch and Reproduction Labels
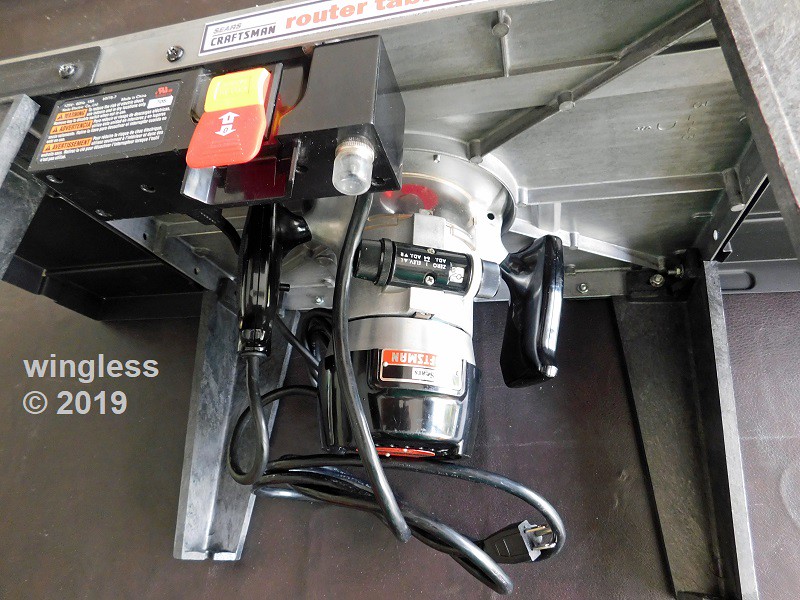
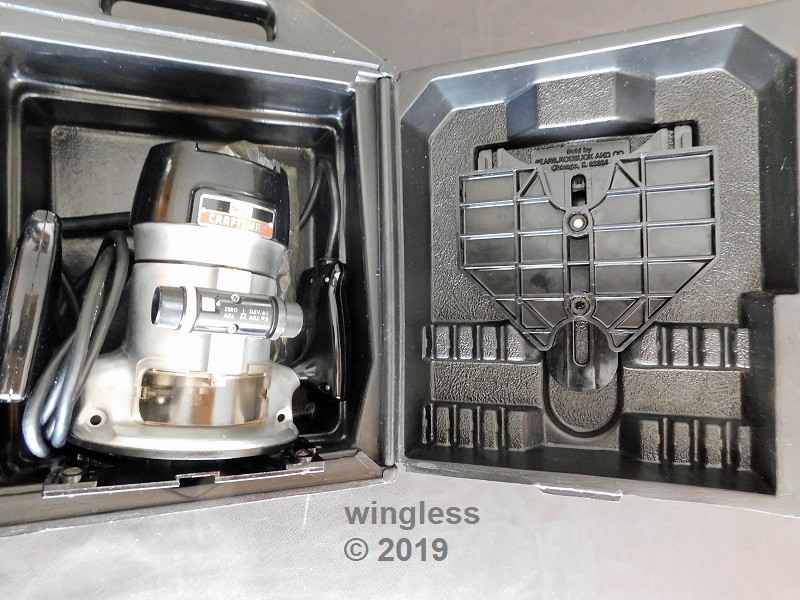
Router Attached to Bottom of Table and Power Switch
Router Attached to Table
Operation Manual Cover
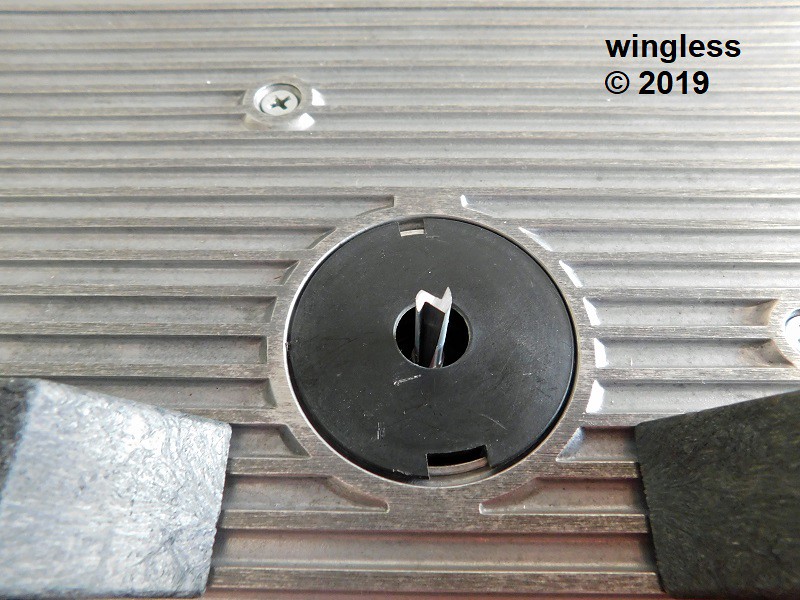
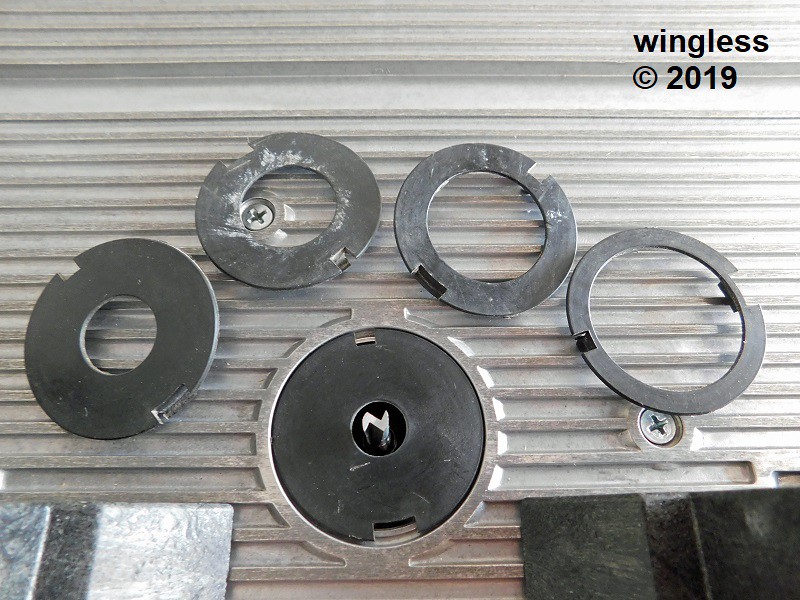
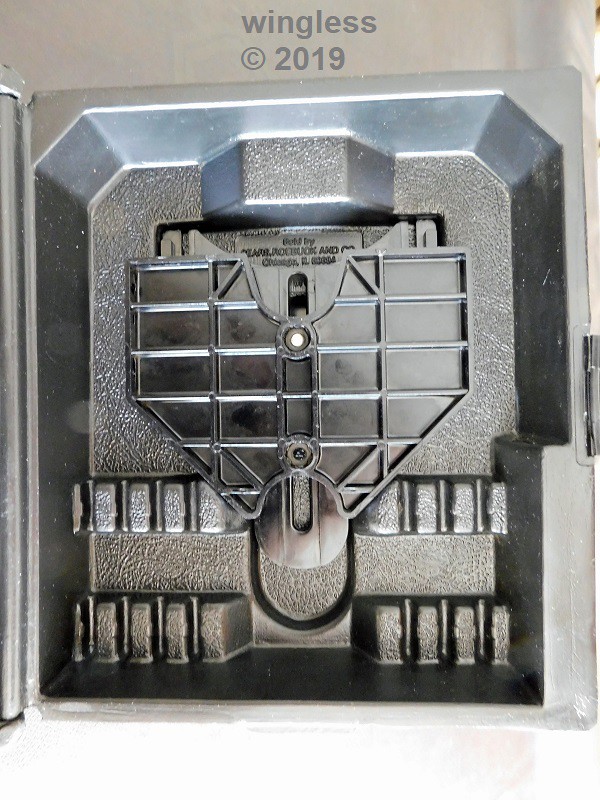
29L-202 / 1609441472 Unobtainium Table Insert Set
Craftsman MPP010105023 Router Table Screw - Showing Undercut at Head / Threads
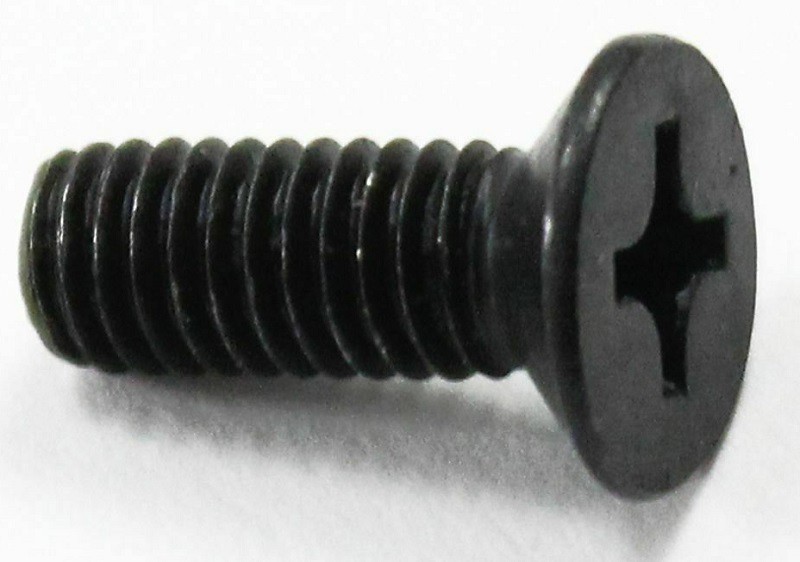
Standard Screws Modified w/ File to Include Undercut at Head / Threads
-
Welcome to the forum.
Contact DeWALT to see if they have a way to determine real versus counterfeit.
It may be that the old 18V battery is tired and a new / fresh battery will provide expected performance.
-
Welcome to the forum.
Here is an image.
[
-
Another way to get a flush bond is to spot weld.
-
1
-
-
Welcome to the forum.
This link shows the various rivet styles.
https://www.hansonrivet.com/rivets/know-your-rivets
A press is required to use the smooth rivets. The rivet length must be properly selected.
-
1
-
-
Just call DeWALT and let them fix your problem.
-
Welcome to the forum.
The best option would have been to fully charge the batteries prior to leaving the UK.
Select the US charger with the desired current output for maintaining your batteries.
The DCB112 has a 2.0ADC output, good for the small 2.0Ah batteries. There is also a DCB115 with the 4.0ADC output, good for the medium sized 4.0Ah and 5.0Ah batteries. These chargers are 120VAC 60Hz only.
The US 20V MAX XR batteries are the same as the 18V ROW batteries. The US is still selling 18V XRP tools, so a distinction is required to decrease confusion.
-
Welcome to the forum.
According to the images on the Makita site, that XPH11ZB is supposed to have a gap between the chuck and the body.
Enjoy your new tool.
-
No worries.
My plethora of corded tools makes me a confirmed tool troglodyte too,
-
 1
1
-
-
Welcome to the forum.
Good find on the tool.
What is that wire thingy coming out of the handle?
-
On 2/8/2019 at 8:58 AM, ChrisK said:
I remember Matt Vanderlist getting a granite topped saw from another manufacturer Steel City and he loved it till he got his sawstop. It actually sounds like a really cool table
Yes, the Steel City Tool Works 35911 / 35926 and the Craftsman Professional 351.221160 table saws both have identical cast iron guts / granite top as my Ridgid R4511 table saw.
https://www.amazon.com/steel-city-tool-works-35926/dp/b00a5u1x2o
-
2 hours ago, Jronman said:
But Hurricanes...
Sure, coming from Mr. Tornado Alley...
-
Welcome to the forum.
Get out of Dodge, so the problem stays there and you get warm. It is highs in the low 80s and lows in the low 70s this week in southern Florida...
The saw lubrication has either degraded or is inappropriate for those cold temperatures.
When I relubricated my hole shooter the old grease was hard and the new OEM grease was great.


Old Craftsman sand blaster...
in Welding/Metal Working
Posted
Here is ceramic tubing.
Good luck.