


wingless
-
Posts
710 -
Joined
-
Last visited
-
Days Won
74
Content Type
Profiles
Forums
Events
Posts posted by wingless
-
-
Welcome to the forum.
A better option, instead of this tool forum, is to go to the mind reading forum. They are great on that forum and will know EXACTLY what you need.
Otherwise, provide more information and the members on this forum would be glad to help.
-
Welcome to the forum.
My experience is that one of the home wiring voltage "sniffer" tools is very handy when chasing problems like this. Placement of the tip near the wiring reveals when voltage is present or not. That is helpful to understand where the problem exists.
-
Welcome to the forum.
On by jig saw, the T Shank blade is retained firmly by the tool, once the blade retainer is tightened. There is no up/down or rotational slop, where the blade is retained by the tool.
The side to side slop is controlled by a grooved roller against the back edge of the blade.
-
 1
1
-
-
The rusting on mine was also discovered after the fact. My resolution for eliminating the rust was to first use a utility knife blade to hand scrape the surface, then sanded to attain the condition shown in the images. It has maintained in that condition for over a year w/ the light oiling.
-
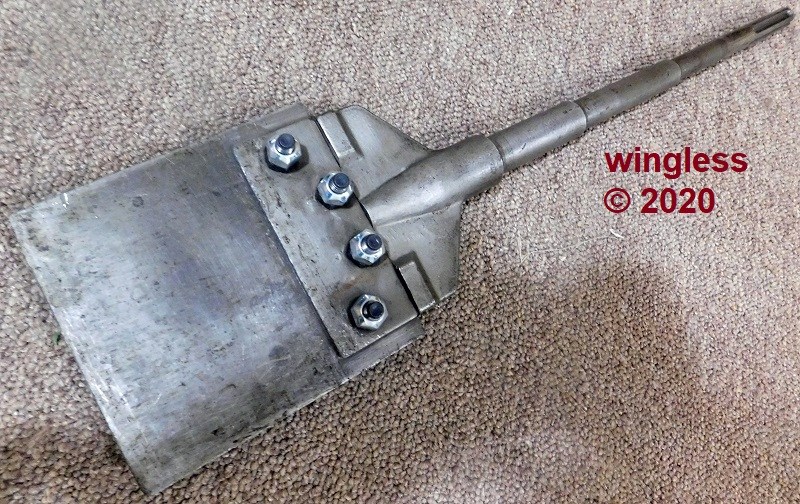
My SDS-Max tile and thinset removal tool has been VERY handy. I have used it to remove two houses of wall to wall tile. It works great to remove tiles and thinset, usually intact.
The tool is uncoated steel that will rust, so maintain an oil coating whenever the tool is stored for surface protection.
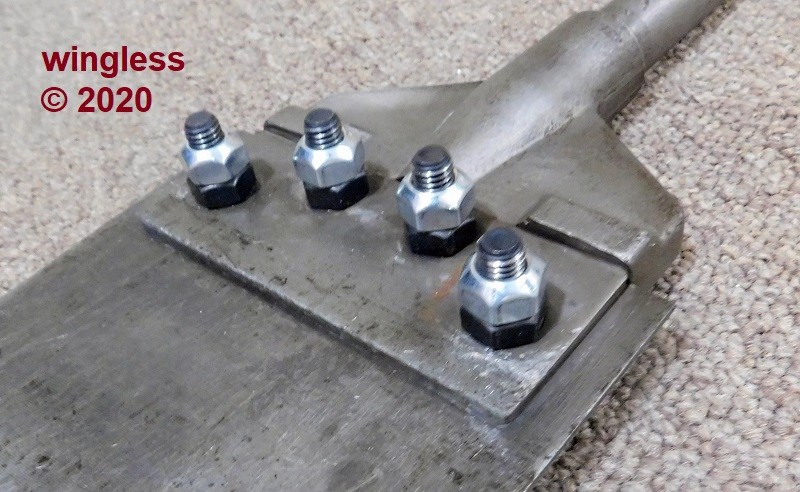
The only deficiency on this tool are the fasteners retaining the blade to the shaft. The fasteners get unbelievably hot during usage, greatly exceeding the Nylock nut 220°F maximum operating temperature, permitting the nuts to loosen and the bolts to break.
Any decent size project will quickly consume both sets of fasteners.
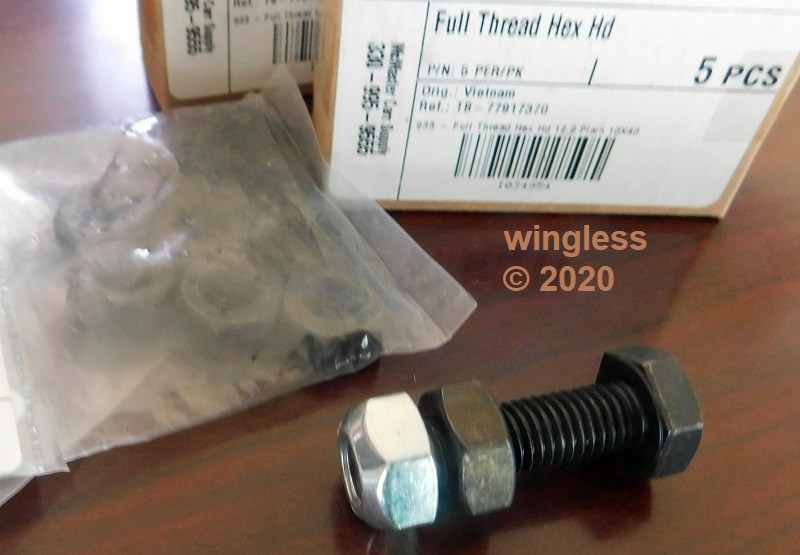
My solution was instead to switch to hardened metric M10-1.5 fasteners and use distorted thread lock nuts. Those nuts don't have a specified maximum operating temperature. That hardware change was effective, using this Class 12.9 M10-1.5x40 bolt, this Class 12 M10-1.5 nut and this Class 10 M10-1.5 distorted thread nut.

-
Not $50, but my Festool Rotax RO150FEQ is an amazing tool, easy to toggle between rough and fine finishing,
Mine has been operated for endless continuous operation and still looks and performs like new.
The vacuum sanding is a clean operation, but even more important, it keeps the sandpaper cool and clog free, with each disc lasting very, very long.
-
Welcome to the forum.
My speculation is that the OP has zero experience w/ this tool and looking for the starting point.
If so, then online searches reveal a plethora of information, here is one.
A table saw is a very useful tool, but must be used properly and safety.
One common improvement to increase utility and safety is to construct utilize sleds.
The OP should feel free to provide a more narrow definition of how members may assist better.
-
1
-
-
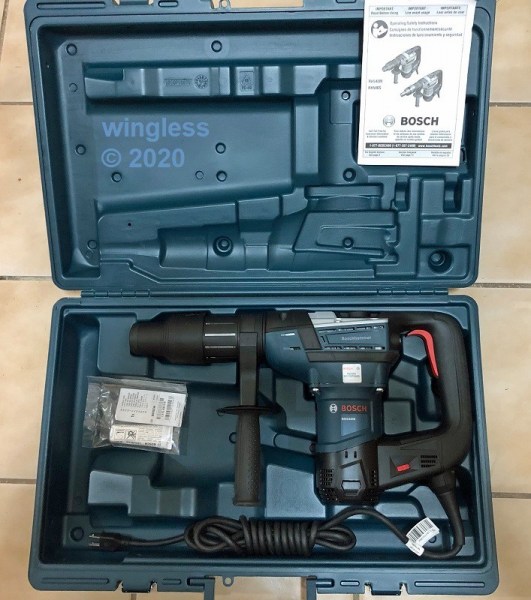
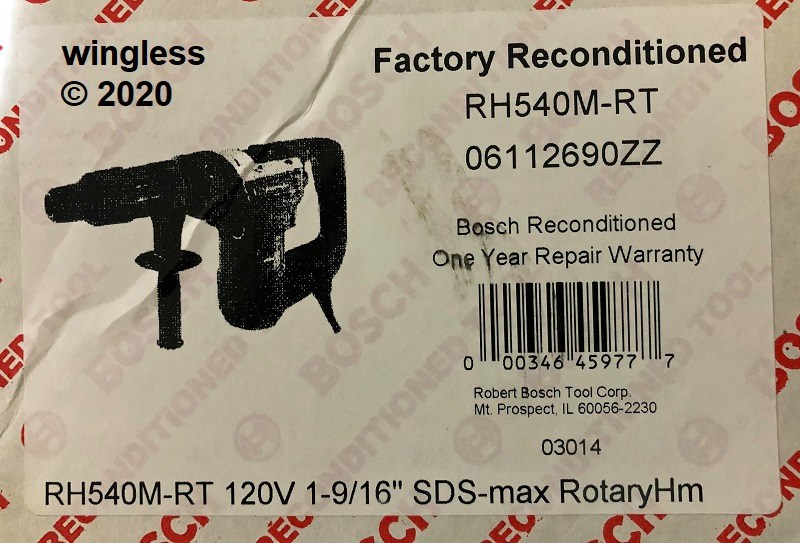
The latest remodel project for me and my daughter requires a SDS-Max hammer tool. I selected the Bosch RH540M and decided on the rebuilt tool available from CPO Outlets on Amazon for the huge cost savings.
That selection was a great decision. The tool arrived quickly. The tool has a new enclosure, cord, case, manual and grease tube. The operation feels like a new tool. The tool includes a one year repair warranty.
The tool has a collar sleeve that is pulled back to the handle to insert or remove the SDS-Max bit. The bit splines are keyed to only insert at one orientation. There is a large paddle switch for on/off, easy to operate even wearing gloves. The auxiliary handle is easy to position at any 360° orientation, twist to loosen / tighten. There is a variable speed numeric speed dial control. The large selector lever permits changing the mode, from hammer drilling to hammer, also permitting the rotation of the bit to be selected prior to hammer, 12 positions available.
The tool has a clutch for hammer operation, requiring the bit to be pushed into the surface to start the hammer.
The first operation was bathroom floor tile removal. That went fine, with the biggest butt pain being waste removal.
Tool operation should include protection for hearing, eyes and skin.


-
1
-
-
Welcome to the forum.
Cool tool.
Can additional image(s) please be provided showing a close up on the "chuck"?
-
On 10/25/2020 at 11:26 AM, Badgerstate said:
You typically would only use the hammer function when drilling into brick or concrete, not when driving screws. I would say that if you have a drill and a hammer drill, you probably don't really need an impact driver unless you just want something that is faster.
Welcome to the forum.
Sorry, I must disagree, the impact driver is the best tool for driving / removing fasteners. The impact driver is very effective, causing the least damage to the head, providing the best results, as compared to using a drill or using hand tools.
-
1
-
-
Welcome to the forum.
My hammer drill may be toggled to normal drilling, so I use that single tool for both types of drilling operations. My drill has been retired to be a spare tool on my boat.
The impact driver tool is used for fastener insertion removal.
In my case, two tools are required, not three.
-
1
-
-
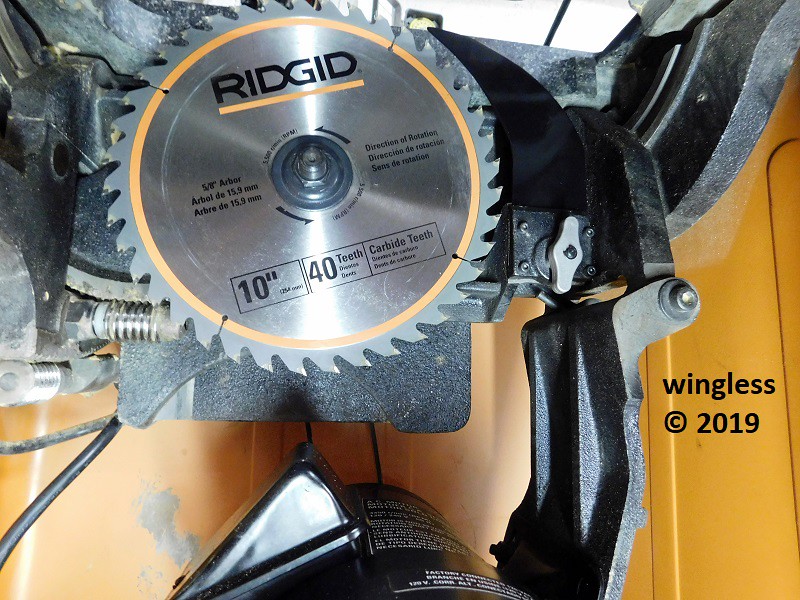
My tool set has included several portable contractor saws over the years, then I landed my Ridgid R4511. I love this saw.
One of the attributes that initially amazed me, plus continues to provide satisfaction at each usage, is just how quiet this tool is during operation, as compared to my direct drive portable contractor saws.
In my case I made several minor tweaks and now mine makes very accurate cuts.
The cabinet on my saw was also completely full of sawdust, filling almost two 5 gallon buckets before I loaded it into my Grand Cherokee.
Mine is also currently in a crowded garage, so I use the Herculift to shift the saw when required for working on larger stock.
BEST OF LUCK with the repair! Please know that there is an eccentric on the worm gear to adjust the engagement to the rack gear, if required.
Please report on the results.
Note that the existing part could be used as a mold to recreate a new casting. It would be required to slightly increase the exterior dimensions because the part will shrink slightly when cooling. Or a slightly larger part could be made of wood or could be 3D printed.
Did yours include the blade guard? There is one for sale on eBay that appears to fit.
-
Here is an example of creating a cart iron part.
-
Welcome to the forum.
When I need a tool like this I use Craig's List and Offer Up to locate something that meets my requirements at an appropriate cost. It may take time for a match to arise.
-
Welcome to the forum.
Why not purchase an inexpensive nut driver or socket, then modify that tool to carefully decrease the wall thickness to 0.75mm thick, such as w/ a grinder?
-
On 2/15/2019 at 1:16 PM, wingless said:
Yes, the Steel City Tool Works 35911 / 35926 and the Craftsman Professional 351.221160 table saws both have identical cast iron guts / granite top as my Ridgid R4511 table saw.
https://www.amazon.com/steel-city-tool-works-35926/dp/b00a5u1x2o
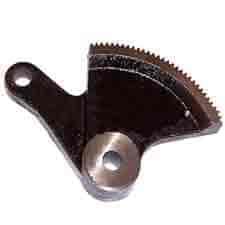
On 10/11/2020 at 2:17 PM, kriz_k said:Hi im too in the process of restoring. Im just about done with all the extras (extensions, router insert), but i have a big issue and that is the pivot bracket b43. Mine was completely mangled. There were only 5 teeth at the very end of the bracket (when blade fully raised) and 1 tooth at the begining of the bracket. Does any one know where i can find this bracket. i had it welded twice and i cut the teeth, but the second time welder didnt put enough and after cutting, teeth dont touch. I have spent so much time on this already that i m starting to give up. Help
Welcome to the forum.
That is very unfortunate.
As you probably know, the Ridgid 089037005129 Pivot Bracket and the identical Craftsman 31061.00 Table Saw Pintle are both discontinued parts. I was unable to locate the Steel City Tool Works P/N, but my guess is that it is also no longer available.
It may not hurt to contact Ridgid by telephone to see if they may be able to help.
This link shows that Ridgid 089037005129 Pivot bracket. This link shows that Craftsman 31061.00 Table Saw Pintle part.
If retaining usage of this tool is desired, then it may be required to manually duplicate and fabricate that part, w/ casting and machining the replacement.
Has the adjustment on the worm screw been attempted to improve / resolve the engagement problem? Does that existing adjustment have insufficient range to resolve the problem?
This image shows that part, behind the blade. It also shows the worm screw w/ the eccentric sleeve w/ integral adjustment nut.
-
Great job. Thanks for sharing.
-
1
-
-
Welcome to the forum.
FWIW, that compressor is a few notches above a toy, so the fact it is making useful pressure is good.
There are very few applications that require higher pressure, like 300 PSI. If those pressures are required, then this compressor might not be the best choice.
Yes, there must be volume above the piston. When creating a performance engine, one step that is used is to shave the head, to decrease the volume and to increase the compression. Another step is to replace the crankshaft to increase the stroke, increasing the displacement. Neither are applicable here.
My guess for the reason the pressure reaches a plateau is that the valves are likely incapable of greater pressure. There may be piston ring blowby causing this limit. There may be a leak causing the limit.

-
1
-
-
Welcome to the forum.
Based on the limited info, it looks like the bearing is pressed into the housing.
-
Excellent job!
Waaay better than the pink version being sold on Amazon. Was that the starting point?
-
1
-
-
Welcome to the forum.
Assuming this is a rotation micrometer style torque wrench.
If the wrench is rotated past the minimum by a small amount, but not so far that the handle unscrews from the mechanism threads, then it is fine.
When doing that on my wrenches I am laser focused on that activity to ensure that problem doesn't occur
-
1
-
-
Welcome to the forum.
My gasoline pressure washer has been a solid performer for decades. It is still one of my favorite tools to use, followed by a long shower to remove dirt from places I didn't know I had.
-
Welcome to the forum.
The Mighty Vac hand vacuum pump kit has been a solid performer for me for decades.
-
1
-
-
Welcome to the forum.
All of the DeWALT small angle grinders come with only the Type 27 guard. That is general purpose for most applications.The DeWALT Owner's Manual shows which wheel types are applicable for that guard.
The Type 1 guard has a full shroud and is shown for usage with flat wheels, such as the diamond blade. The Type 1 full shroud provides greater protection if a wheel should fail.
My experience has consumed many wheels and I am fortunate to never have experienced a wheel failure.
The clamp nut is designed to work with thick and thin wheels. The thick wheels are clamped with the side having the raised collar. The thin wheels are clamped w/ the flat side. Ensure the wheel is secure before turning on the tool. The tool manual shows when to use one side or the other of the nut. My experience is there is zero question based on the wheel, thick go one way, thin the other. A thin wheel will wobble if incorrectly clamped.


Dryer vent next to out door electrical outlet
in Around The House
Posted
Welcome to the forum.
Doesn't that exterior receptacle have a sealed protective cover? If not, then it should be covered.
My southern Florida / salt water canal experience is that exterior receptacles require replacement every 5-10 years from corrosion. The spring loaded door covers require replacement every 10 years.